Showing posts with label Baking. Show all posts

Sunday, June 7, 2026

Chinese Quince Cake


Chinese quinces! I got two and decided to make a cake! 

First I peeled and sliced the quinces, removing the stones, and then I cooked them with lemon juice, a tiny bit of water and very little sugar (about a tbsp).

Then I made the base, and for this cake it comes from my book Sweet As..., it is the base for most of my fruit cakes, and the original recipe is on page 28, where is used for a cherry berry cake. I start by mixing 4 eggs with 200 g of sugar, then 250 g of self-raising flour, and the zest of one lemon (optional) and 50 g of partially melted butter (I use salted butter, otherwise add a pinch of salt to the mixture). In the recipe in the book I start with mixing the butter with the sugar, this gives you a 'sponger' cake and it is suitable for berries, but quince slices and heavier fruit pieces call for a lightly more compact base and you can achieve that by adding the butter last. 

Honestly, this basic recipe is so good ... I know that I shouldn't brag because it is my own creation, but it is one of those that I make over and over again, and even my Mother in Law was complimentary (and she was a great baker, from Christchurch too, and they are choosy about their recipes there, especially when they come from foreigners).

Last step: I poured the mixture in a 23 cm round baking tin lined with baking paper, and arranged the cooked quince slices on top (had some left over, in the freezer now, for cupcakes later on). I sprinkle just a little bit of sugar on top and baked the cake at 180°C for approx. 45 minutes. I eat it as it is, and my 


Photos and Recipes by Alessandra Zecchini ©

Friday, March 13, 2026

Dolcetti alle mele - apple cupcakes/muffins


Ingredients for 12 cupcakes/muffins

3/4 Oratia apples
40 ml water
10 ml lemon juice
A pinch of ground cinnamon
3 cloves
120 g salted butter
3 eggs
130 g sugar
A few drops of pure vanilla essence (optional)
200 g self-rising flour
Granulated sugar to top, or icing sugar to finish (optional)


Preheat the oven to 175°C. 

Line a 12-muffin tray with cupcakes paper cups.

In the meantime place the water and lemon juice in a mixing bowl, peel and slice the apples and drop them directly into the lemony water.

Melt the butter in a jug, in the oven (while the oven is warming up for the cupcakes). Place the eggs and sugar in a mixing bowl and whisk, using an electric beater, until the mixture looks light and pale yellow in colour. Slowly add the melted butter and the vanilla essence, if using.

Drain the apples (keeping the water) and remove the 3 cloves.
Keep beating the mixture at a low speed now; add half of the flour followed by half of the lemony water from the apples. Add the rest of the flour and water and keep beating making sure that there are no lumps. Divide half of the mixture into the cupcakes paper cups.
Add the apples and then cover with the rest of the mixture. 
Bake for about 18-20 minutes, until golden brown at the top.

I had some Italian granulated sugar so I sprinkled it on top, but it is not necessary, and I have never seen it sold in New Zealand. A sprinkle of icing sugar will do.


  Photos and Recipes by Alessandra Zecchini ©

Monday, September 8, 2025

Crostata di marmellata di more e lamponi


I mede a lot of jam this Italian Summer, from fruit that I foraged and also picked from the garden.
Foraged: raspberries, blueberries, blackberries.
Picked: red currants, yellow plums, cornelian cherries.

I gave away some jam because I cannot take it back to New Zealand, but also made several crostata, Italian jam tarts, and this one has two jams: half raspberry and half blackberry. 

Ingredients:
100 g butter
100g sugar
300g flour
1 tsp of baking powder
1 small glass of Sassolino 
(this is a local aniseed liqueur, you can substitute with Sambuca, or with your favourite liqueur)
2 eggs
jam to fill


Mix the butter with the sugar, then add the other ingredients in order and mix. You will get a soft sticky dough. Keep about a fifth of the dough aside for the topping, and spread the rest in a tart pan based with baking paper. You cannot roll this dough with a rolling pin, it is too soft, you must spread it on the base and borders with your fingers. It may sound strange but this way you will get a crostata base that is not dry (as it often happens!).


Add the jam (or jams, in this case)


Roll the remaining dough into thin strips and place over the tart. Because this recipe has baking powder the strips will become larger during baking, so make them thin.


Bake at 180°C fan oven for about 45 minutes. Let it cool down completely before lifting out from the baking pan.


And here another one I made with yellow plum jum!


Photos and Recipes by Alessandra Zecchini ©


Friday, November 25, 2022

Ricotta cake with fresh redcurrants - Ciambella alla ricotta con ribes rosso


From my book Sweet As... ciambella alla ricotta. Ricotta ring cake. Usually made with jam filling, this time I added fresh redcurrants, it was great!

Ingredients
250 g ricotta
300g sugar
3 eggs
300 g self raising flour
grated ring of 1 lemon
1 cup of cleaned fresh redcurrants

The original recipe is in my book Sweet As...


Here is a quick explanation: cream together the ricotta and sugar, then add all the other ingredients following the order in the ingredient list. Bake at 180C for approximately 40mins. Sprinkle with icing sugar and decorate with fresh redcurrants.

 Photos and Recipes by Alessandra Zecchini ©


Monday, April 25, 2022

Feijoa cake


👩🏻‍🍳about 20 feijoas, 3 eggs, 200 g sugar, 80 g butter, melted (I used salted butter, if you use normal butter add a pinch of salt to the mixture), 200 g self raising flour and a drop of pure vanilla essence. 

Cut the feijoas in two halves and remove the flesh with a teaspoon. Set aside. Beat the eggs and sugar first until the mixture is pale yellow, then add the butter and, little by little the flour. End with vanilla. Stop beating and fold in the feijoas. Pour into a greased or lined baking tin (20cm is good) and bake at 180℃ for about 45 mins (until a toothpick inserted into the centre of the cake comes out clean). Tip upside-down on a serving plate while still hot, the feijoas tend to go to the bottom so I keep the cake upside down to have them at the top. Dust with icing sugar and let it cool down completely before serving (so that the base of the cake will flatten nicely). Yum with cream or mascarpone!

Also, did you know that you can eat feijoa flowers too? Find out more here


Photos and Recipes by Alessandra Zecchini ©


Saturday, January 8, 2022

Ricciarelli di Siena, and homemade/recycled Christmas decorations


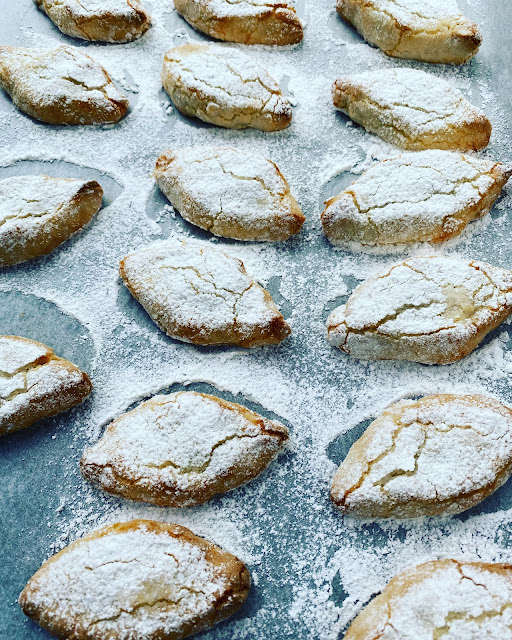
Ricciarelli are delicious Italian (Tuscan) almond sweets, apparently originated in the XIV century.
Making them in New Zealand is quite special, as they really give Xmas an Italian flair. Bitter almonds are one of the ingredients though, and I have not found them here, so I added just a few apricot kernels (be careful, they are poisonous so you just need a tiny amount, and they MUST be blanched). Of course this is optional, you will get great results just with regular almonds.

200 gr of almonds
about 6 to 10 apricot kernels
200 gr of sugar
2 egg whites
zest of an orange or a tbsp of candied mix citrus peels
Possibly some more ground almond if the mixture is too wet
plenty of icing sugar to roll and dust

Blanch the almond and the apricot kernels separately in hot water and remove the skin. 
Place them in the food processor with the sugar and grind to a powder. Do this in two lots, on pulse, making sure that the mixture doesn't heat or becomes a paste.

Lightly whip the egg whites, just gently, they don't have to be stiff like for a meringue, just starting to be white. Add the ground almonds and the orange zest or candied citrus peels. Mix well, if it feels too soft add a little ground almond. Cover and place in the fridge overnight.

The day after flour a board or working surface with icing sugar and roll the paste into thin rolls, about 2-3 cm thick. Cut and shape into biscuits, about 1.5-2 cm high. the traditional shape is like a grain of wheat, with two pointed ends. 

Place on a oven tray lined with baking paper and sprinkle with more icing sugar. Bake at 150C for 15 minutes or until the edges start to be golden. Ricciarelli should not be overcooked! Let them cool down completely before removing them from the baking tray. They keep well for a couple of weeks in a biscuits tin. 


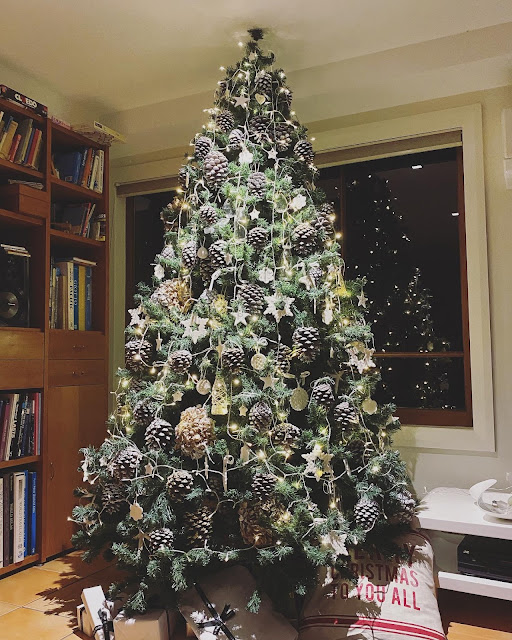
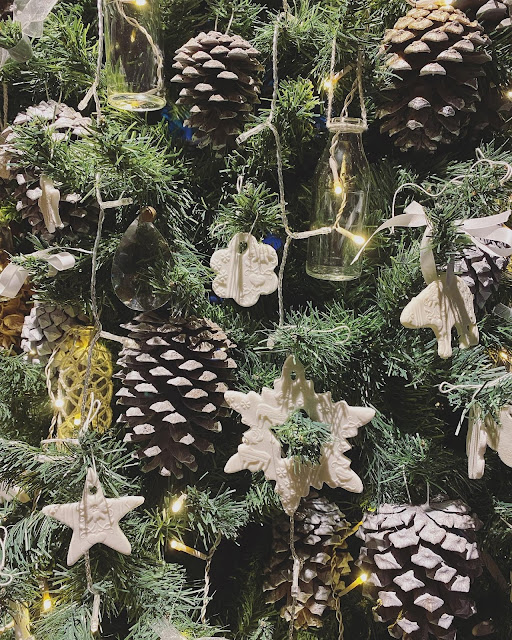
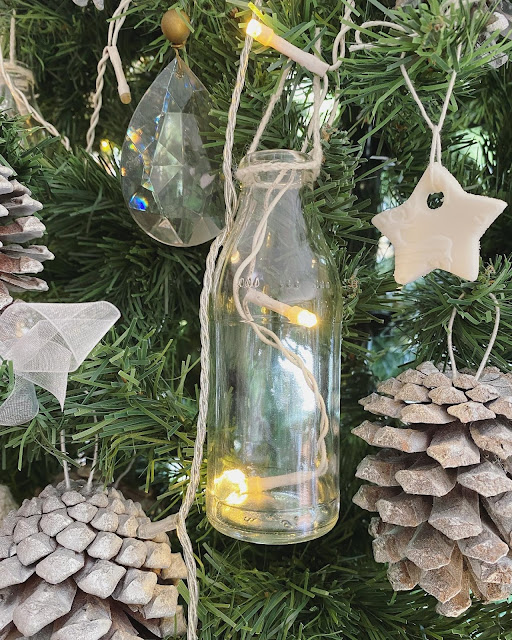
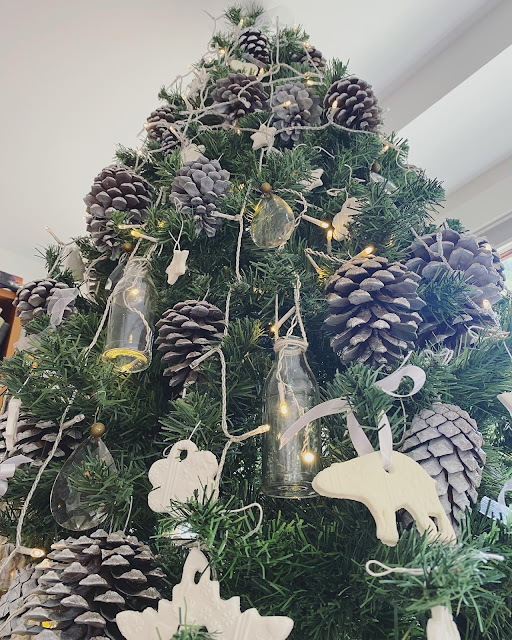
All the decoration on this Xmas tree are homemade or recycled.


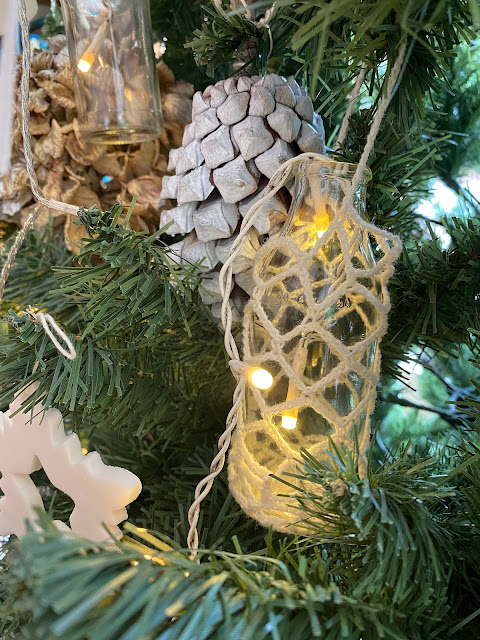
I recycled small bottles fro Italian fruit juices and crochet around them to make lights. I used recycled old wool for the crochet, and also made a few balls and little doilies. I foraged and painted the pine cones, and also spray painted some dried hydrangeas flowers. And then my usual sugar decorations, made with fondant, all white this year! Finally I recycled the crystal drops from a broken chandelier, they look classy on the tree!


 Photos and Recipes by Alessandra Zecchini ©

Friday, July 23, 2021

Soft baked cheesecake, "Japanese style"


One thing that I loved about living in Japan were the cakes, both Japanese and Western style. In fact the Western style cakes not only are of an incredible high quality, but they also seem lighter and less sweet that what we have here in New Zealand. The baked cheesecake has always been one of my favourites, I do find it a little 'eggy' perhaps, but every now and then it is fun to make!

Ingredients

1 x 250g pack of cream cheese (I used Philadelphia) 

50g butter (I used salted butter, follow instructions if you use unsalted butter)

150ml cream

50 sugar

5 eggs (large)

80g self rising flour

lemon zest and juice

Apricot jam for the topping (optional)

Cube the cream cheese and butter and place into a mixing bowl with the cream and sugar. If you use unsalted butter add a very small pinch of salt too. Place the bowl on a pot with boiling water (Bain Marie)  and mix well until all the ingredients are melted. Make sure that there are no lumps of cream cheese! Remove from the heat and then add the egg yolks, one by one, mixing well.  In the meantime whip the egg whites to a stiff peak, and also heat the oven to 180C. Add flour to the main mixture, then lemon zest (1 lemon) and lemon juice (one or two tbsp, depending on your lemon - Mayer lemons are sweet so you need more, if you use a more acidic lemon one tbsp will suffice). Fold in the egg whites little by little. Pour into a 18cm round baking tin lined with buttered baking paper (on the bottom and side of the tin - I butter both the tin and the baking paper). Place the tin on a larger baking pan filled with 30-40cm of hot water and place into the oven. The cake will also bake at Bain Marie. Turn the heat down to 160C and bake for about one hour. Turn the oven off but do not remove the cheesecake: leave it to cool down in the oven with the oven door slightly open. Sadly it will drop a bit in heigh while cooling, but this is normal. I am not sure what kind of stabilisers commercial bakeries use to keep their baked cheesecakes super high, but this is more about taste, and the homemade does taste better! When the cheesecake has cooled down remove from the baking tin and if you like brush the top with a little apricot jam thinned with hot water. 

I particularly like this cheesecake because it is so soft and not so sweet, so I can have it for breakfast with my coffee. For dessert instead I like to add some Italian amarena cherries in syrup, or some berries, fresh or frozen, marinated with a little sugar and lemon juice, to give it a bit more sweetness and flavour.


And now some flowers for my Pinterest 


Photos and Recipes by Alessandra Zecchini ©


Thursday, February 18, 2021

Apple cupcakes with dried flowers


I have a selection of dried petals: blue cornflowers, red petals (a mixture of rose, verbena, dianthus) and orange and yellow (marigold and calendula), ready to add to a cake or cupcakes or muffins.

Ingredients for 12 cupcakes/muffins

4-5 Oratia Beauty apples
40 ml water
10 ml lemon juice
120 g salted butter
3 eggs
130 g sugar
A few drops of pure vanilla essence (optional)
200 g self-rising flour
Dried flowers
For the icing:
100 gr butter
100 g sugar
more dried flowers


Preheat the oven to 175°C. 

Line a 12-muffin tray with cupcakes paper cups.

In the meantime place the water and lemon juice in a mixing bowl, peel and slice the apples and drop them directly into the lemony water.

Melt the butter in a jug, either in the microwave or in the oven (while the oven is warming up for the cupcakes). Place the eggs and sugar in a mixing bowl and whisk, using an electric beater, until the mixture looks light and pale yellow in colour. Slowly add the melted butter and the vanilla essence, if using.

Keep beating at a low speed now; add half of the flour followed by half of the lemony water from the apples. Add the rest of the flour and water and keep beating making sure that there are no lumps. Add the apples and the dried petals. Divide into the cupcakes paper cups.

 
Bake for about 18-20 minutes, until golden brown at the top. You can also check by inserting a toothpick into the cupcakes: if it comes out clean the cupcakes are ready. Remove the cupcakes from the tin and let them cool down. The icing is optional, I just mixed some melted butter with sugar and used it to top the cupcakes, then sprinkled more dried petals on top. 


Photos and Recipes by Alessandra Zecchini ©

Friday, April 10, 2020

Covid-19 lockdown recipe 6: a super soft and super easy (and dairy free) apple and pear cake


 🍎🍐 I bought quite a few apples and pears from the orchard in Oratia before it closed down and I needed to use those which were getting a bit soft, so I peeled and cut about 1kg between the two and added lemon juice. They were quite “lemony” 🍋😊 and I thought of using my lemon cake recipe from the book Party Food for Girls, with a few variations. 

👩🏻‍🍳 4 eggs, 250 g sugar, 200ml vegetable oil, 250 g self raising flour and a drop of pure vanilla essence. 

Beat the eggs and sugar first until the mixture is pale yellow, then add the oil and, little by little the flour. End with vanilla. Stop beating and fold in the apples and pears. Pour into a greased or lined baking tin (23cm is good, lots of cake here) and bake at 180 for 45 mins to one hour (until a toothpick inserted into the centre of the cake comes out clean). Cool down completely before removing from the tin. Dust with icing sugar. Try it and you will thank me for the recipe 😊
🍎🍐🍏

Photos and Recipes by Alessandra Zecchini ©


Tuesday, May 21, 2019

How to bake cookies with flowers


Fresh edible flowers make a lovely addition to cookies, I find them quite elegant and delicate. I tried a few and the verbena are very good for shape and colour, the pink ones especially (they remain pink!), the red ones turn deep reed and the white and mauve turned... blue! Calendula and marigold petals keep their yellow and orange hues well, dianthus petals tend to shrink... but all in all I am pleased with my experiments, and the final results. 


Any cookie recipe that doesn't require too long in the oven would work, I just made some simple cookies with butter, self raising flour, sugar, vanilla and eggs, shape into little biscuits and placed them onto a oven tray lined with baking paper (leave some space between the cookies so they can 'spread' while baking). Then I topped each cookie with a small flower or some petals.


It is a good idea to gently press the flowers and petals into position over the cookies with wet fingers.


Finally I lined another sheet of baking paper on top, pressing down gently on the flowers. I put some ramekins on the ends to keep the baking paper down before placing the tray inside the oven, to make sure that the paper didn't lift off while baking.


My cookies took about 12 minutes at 160℃, but it all depends on recipe and size, so you'll just have to regulate yourself.  When ready remove from oven, peel off the top baking paper sheet, add some icing sugar, if you like, and let the cookies cool down completely before removing them from the baking tray.


Enjoy!


 Photos and Recipes by Alessandra Zecchini ©

Friday, February 8, 2019

Oratia Beauty Cupcakes (or muffins)


February is the month to celebrate our Slow Food Auckland heirloom apple Oratia Beauty.
These beautiful apples are available at the Dragicevich Orchard: 556 West Coast Rd, Oratia. I usually eat them raw or make cakes, but this time I made some cupcakes to take to the Slow Food Picnic at Waitantgi at Waititi

This is my very own cupcake recipe, which I adapt easily and frequently (to add fruit and/or other ingredients) and always works well. The outcome with apple is a bit of a 'muffin', thus the double name in the title of this post.

The doses below are for 12, but I doubled them for two tins of cupcakes (so about 8-10 apples, 220g butter, 6 eggs etc.). If your cupcake tin is for smallish cupcakes you may have some leftover mixture even with below doses, so scroll down for more ideas. 

Ingredients for 12 cupcakes/muffins

4-5 Oratia Beauty apples
40 ml water
10 ml lemon juice
120 g salted butter
3 eggs
130 g sugar
A few drops of pure vanilla essence (optional)
200 g self-rising flour
Granulated sugar for topping (optional, this in an Italian product, not sure if available in NZ, but it is not vital to the recipe!)


Preheat the oven to 175°C. 

Line a 12-muffin tray with cupcakes paper cups.

In the meantime place the water and lemon juice in a mixing bowl, peel and slice the apples and drop them directly into the lemony water.

Melt the butter in a jug, either in the microwave or in the oven (while the oven is warming up for the cupcakes). Place the eggs and sugar in a mixing bowl and whisk, using an electric beater, until the mixture looks light and pale yellow in colour. Slowly add the melted butter and the vanilla essence, if using.

Keep beating at a low speed now; add half of the flour followed by half of the lemony water from the apples. Add the rest of the flour and water and keep beating making sure that there are no lumps. Fill some cupcakes paper cups with the mixture and top each one with two or three slices of apple. Sprinkle with granulated sugar 

 
Bake for about 18-20 minutes, until golden brown at the top. You can also check by inserting a toothpick into the cupcakes: if it comes out clean the cupcakes are ready. Remove the cupcakes from the tin and let them cool down. 


Because I double the doses to make two tins I also made a few plum cupcakes (basic recipe here) with Luisa and Black Doris Plums (also from the Dragicevich Orchard in Oratia) and, with still a little mixture left (when you use slices of fruit they do take space!), two heart shaped mini cakes (apple, plum and raspberry). 


And now the latest posies from Instagram, all flowers from my garden except the orchids (from Larsens Orchids in Oratia) 


Photos and Recipes by Alessandra Zecchini ©


LinkWithin

Related Posts with Thumbnails