Tuesday, July 19, 2011

In praise of chickpea flour, eating broccolini flowers and carrot leaves, and natural skin care


Chickpea flour, also called gram flour, or besan, or garbanzo flour, is a wonderful product. It is gluten free, high in protein, iron and vitamins, and perfect for vegetarians. I payed $3.50 for a kg bag in the Indian store, and 1 kg goes a long way. My main reason for buying it was to make fritters, like onion bhaji
while the only Italian dish based on chickpea flour I am familiar with is Farinata, a kind of savoury pancake, so my repertoire was a little limited. Then the other day I was making some spicy marinated tofu, and I always have leftover marinade when I do this, so I thought of 'scooping it up' with a few veggies and the chickpea flour as a binder.


Broccolini flower fritters


My spicy marinade for tofu is based on plain yogurt to which I add a little squeeze of garlic, some freshly grated ginger, a little lemon juice, salt, cayenne pepper, paprika, ground cumin, ground coriander... well, whatever takes my fancy really. I marinate the tofu in the yogurt mixture and then I fry it or grill it or even bake it. I kept the leftover spicy yogurt in its bowl and added a chopped red onion and, not having much more in the veggie garden, I picked up the broccolini that had gone into flower. I chopped them, and then added enough chickpea flour to get a paste that I could spoon into a frying pan with hot oil. Well, that went down a treat, I guess that you can fry any leftover veggie that way.


Carrot leaf fritters


 I also wanted to make something Vegan, since chickpea flour can be mixed with just water and it will still bind like eggs do. For my Vegan fritters I used another overlooked thing from my garden: carrot leaves. I always end up planting carrots to close, and fail to thin them when I should (I just don't have the heart to do it...) so I had to pick up a few little ones to let their sisters grow in peace. Baby carrots are great anyway, but what a waste throwing out all those pretty leaves! Then I read on the blog Galline 2nd Life (a blog that I enjoy a lot!) a recipe for a frittata with carrot leaves. I washed and roughly chopped the carrot leaves, made a batter with chickpea flour, water, salt and pepper, added a chopped red onion, and fried my fritters. In the end I topped them with some smoked paprika and a few sesame seeds. Good hot or cold.


Natural face mask and exfoliant

The last thing that I discovered about chickpea flour is that it can be used as a face mask and an exfoliant. The Indian lady that was serving me in the shop told me so, she gave me her recipe: a little chickpea flour mixed with natural yogurt and lemon juice, make a paste (last photo on the right, above), put it on your face like a mask, leave it for a few minutes and then rinse. She told me the she used it for acne, and it was the only thing that worked.

Well, I tried for my daughter, and myself, and I am very happy with it, especially because in the last few years, since after reading The world without us by Alan Weisman, I have been avoiding commercial exfoliants, as many seem to be made with synthetic polymers. There is a chapter in this book entitled Polymers are forever, you can actually read the whole chapter by following this link (although if you are the eco type I suggest that you read the whole book :-), but I can tell you that the sentence that most impressed me was this one:

“Can you believe it?” Richard Thompson demands of no one in particular, loud enough that faces bent over microscopes rise to look at him. “They’re selling plastic meant to go right down the drain, into the sewers, into the rivers, right into the ocean. Bite-size pieces of plastic to be swallowed by little sea creatures.”
From The world without us by Alan Weisman, Part II, Chapter 9.


I still remember rushing to the bathroom to check my exfoliant, fortunately it was St. Ives Apricot Scrub, which Thompson claimed to be ok (i.e. 100% natural) but I have not been able to trust ready made exfoliants ever since.


Photos and Recipes by Alessandra Zecchini ©


Sunday, July 17, 2011

Soufflé glacé and MTchallenge


This is the first time that I take part in the MTchallenge from Menu Turistico. I found out about these challenges visiting Italian blogs: at certain times of the month many bloggers seemed to post the same recipe, and I was getting quite confused... and then I found the blog Menu Turistico and (hopefully) understood how it works. Every month there is a cooking challenge, and the winner has to decide on the following challenge. Some challenges seem to be ... challenging, some are more creative, but there are always some obligatory ingredients and techniques. 

The original recipe is from Loredana and you can find it here (in Italian). For the callenge we were allowed to follow the same recipe, or make variations, or make a different soufflé glacé, as long as it was a  soufflé glacé, in taste and appearance, and not a semifreddo or something else... and that we used egg whites for the base, prepared following the Italian meringue method (and not other methods), plus the addition of a sauce/topping... in a few words, something colourful! I decided to go for the original recipe mostly because it had yogurt: my boy is not keen on spoon desserts (unless they have dark chocolate) but he likes yogurt: I could always sell it to him as frozen yogurt! 


The ingredients from Loredana:
  • 3 egg whites (About 100g)
  • 200 g icing sugar
  • 100 ml water
  • 200 ml cream
  • 250 g plain yogurt 
  • 1 tbsp fruit compote

I must confess that I really enjoy making Italian meringue, possibly because it is not something that I see  here in New Zealand. Beat the egg whites really stiff, in the meantime make a syrup with the water and icing sugar (I never used icing sugar for the syrup before, so this was a new one for me!). I don't have a sugar thermometer (didn't I say this already?? A few times?? Yep!) but you see, Loredana doesn't talk about temperatures, she just says to make quite a thick syrup. Ahh, a real home cook! I made my 'thickish' syrup, and I wish that I could explain it better, but it is that stage when the syrup just start to get a little white and you can smell candy floss. Pour the hot syrup slowly into the egg whites and keep beating until they are cold (see first photo below on the left). In the meantime whip the cream, fold in the yogurt, and then fold with the Italian meringue. 

Wrap some baking or cooking paper around the ramekins, leaving about 5 cm border at the top, and securing them with kitchen string (large photo below on the right). The idea looked pretty but... I don't really have the right ramekins: they are not straight but open up at the top, even if very lightly, and although they looked pretty with a kitchen string ribbon... after the first one I secured the others with Sellotape :-P!! I filled the ramekins with the soufflé mixture and I placed them in the freezer.


Next the fruit compote. I heated a few frozen raspberries with a tsp of sugar and mashed them into a sauce. When the soufflés were set I removed a little from the centre and ate it. I loved this step. Place the soufflés back into the freezer until serving time. Finally it was time to serve my soufflés glacés so I filled the holes with the fruit sauce (second image on the left), removed the paper and decorated the tops with a raspberry, a violet (edible) and mint tips. Because there is so much sugar, air and fat in these soufflés, they don't freeze into a block of ice: they are firm yet soft. I will make them again, but smaller portions (here I made 4, but they were rugby player's portions, I think that I should use smaller - and straighter ramekins, and make 6, or even 8) and I will try to use less sugar next time (the boy complained that they were too sweet for his), just to see what happens. 


But for now I am very happy to have tried this lovely recipe, and to be part of the MTchallenge for July. Thank you Menu Turistico and Loredana!

Un PS in italiano: vorrei fare una nota sul colore del mio soufflé: la panna in Nuova Zelanda è molto grassa e piena di vitamina A (le mucche sono al pascolo tutto l'anno, non mangiano fieno ma solo erba verde). Il risultato è che il burro è giallo, e la panna montata non è bianca bianca come in Italia, ma color... panna! Spiegato il colore 'pannoso' del mio qui! Grazie ancora per il challenge, baci A.


Photos and Recipes by Alessandra Zecchini  and http://lacucinadimamma-loredana.blogspot.com/©


Saturday, July 16, 2011

Colours: flowers in the garden and a bright pudding


One of the best things about Auckland is that even in winter, where is raining cats and dogs, the garden is always bright with flowers. My orchids are blooming I have two yellow/green ones two different pink ones (although only one has flowers now). I always wanted to have orchids and these sturdy types can live outside, as long as they are in a sheltered spot. Also the Reinwardtia, or yellow flax, is still full of flowers, even after all that rain and hail we had in the past week.


No blooms from my white camellia yet, but the red one is full of flowers, they are lovely cut flowers for Japanese ikebana and for decorations (like for my bento here). The Rhododendron towering over the carport is also full of flowers, usually they stay for a couple of months, and by September the tree is almost all pink. Potted flowers: the hyacinths are just starting outside...


... while indoors they have already bloomed.


And the recipe for today is a mango pudding revisited: my fool proof recipe for mango and agar agar pudding is here, and for the colourful twist I just added a few mixed berries to the mixture. It looked so pretty that I will definitely make it again. 

Happy weekend everyone!


Photos and Recipes by Alessandra Zecchini ©

Friday, July 15, 2011

Japanese Bento Basket


This is a three layer picnic basket, and I use it as a family size bento box. I got it from the Trade Aid shop and it is perfect for Japanese food: I put napkins, sake cups (or other drinks) and fruit in the bottom basket, then small plates and wooden Japanese bento picks in the middle basket (no chopsticks today, this is all food that you can eat with your fingers, but you can use the picks for the omelette), and the food in the top tray. There is a lid for the top and a handle to carry it. It looks very stylish.


Picnic giapponese in cesto a tre piani


To line the baskets I used some bamboo leaves from my garden, I cut some patterns in some of the leaves to make them more interesting. The food is: Ume Onigiri, Salad Sushi rolls, Nori Omelette, Edamame beans and garnishes.


Salad Sushi Rolls

Wash the sushi rice (or Japanese rice) several times in cold water, until the water runs clear, and then cook it by absorption. The doses are about 1 and 3/4 (three quarters) cups of sushi rice for 2 cups of water, but that depends on the type of pot. You need a pot with a good lid, or you will loose too much steam. I kind of regulate myself by ear now, since I know my pots and pans. Bring the pot to boiling point, lower the heat and simmer until all the water has been absorbed. Once the rice is ready pour it into a bowl and stir it with a wooden spatula, cooling it with a fan if you can. I then add some ready made sushi vinegar, about 2 tablespoons, but this is my personal taste. If I don't have sushi vinegar I use 2 tbsp of rice vinegar, a little sugar and a little salt (to taste, and I don't like to use too much sugar or salt!). Roll the rice with nori seaweed and the filling of your choice: I used carrots, takuan (Japanese pickled daikon) and rocket salad).


Foglie di bamboo come tovagliette


 Onigiri

To make the rice balls cook some Japanese (or sushi) rice as explained above but do no dress with rice vinegar, leave it plain. Start working it when it is still warm: wet your hands with water, and rub them with just a little salt, then shape the balls with your palms, sticking a whole ume (Japanese pickled plum) in the middle while you are working. This time I put the ume not inside but on top, for visual effect, and added a violet (edible) for decoration.


Omelette alle alghe, palle di riso, sushi e fagiolini giapponesi


Nori Omelette 

Beat 4 free range eggs with 1 tsp of vegetable oil and 1 tsp of soy sauce. Heat a large frying pan greased with vegetable oil and pour in the eggs. Lift the sides gently to allow all the egg mixture to run trough and cook. When the omelette is ready to be rolled place one or two sheets of nori (cut it to fit the surface of your omelette) then roll it put. Cut and Serve.


The edamame beans are just boiled, I have been promising the kids that I was going to get them some Mameshiba since they saw them in Cooking Gallery Blog (I love her blog and the kids do too!!). Well, any kind of bean and nut can be a Mameshiba now, but edamame are the best mameshiba for me!
Carrots flowers, takuan slices, pickled ginger and little containers for soy sauce complete the first tray (and a wasabi tube is also in the bottom tray, in case we need it :-).


Photos and Recipes by Alessandra Zecchini ©


Tuesday, July 12, 2011

An Apple Cake and an Apple Strudel


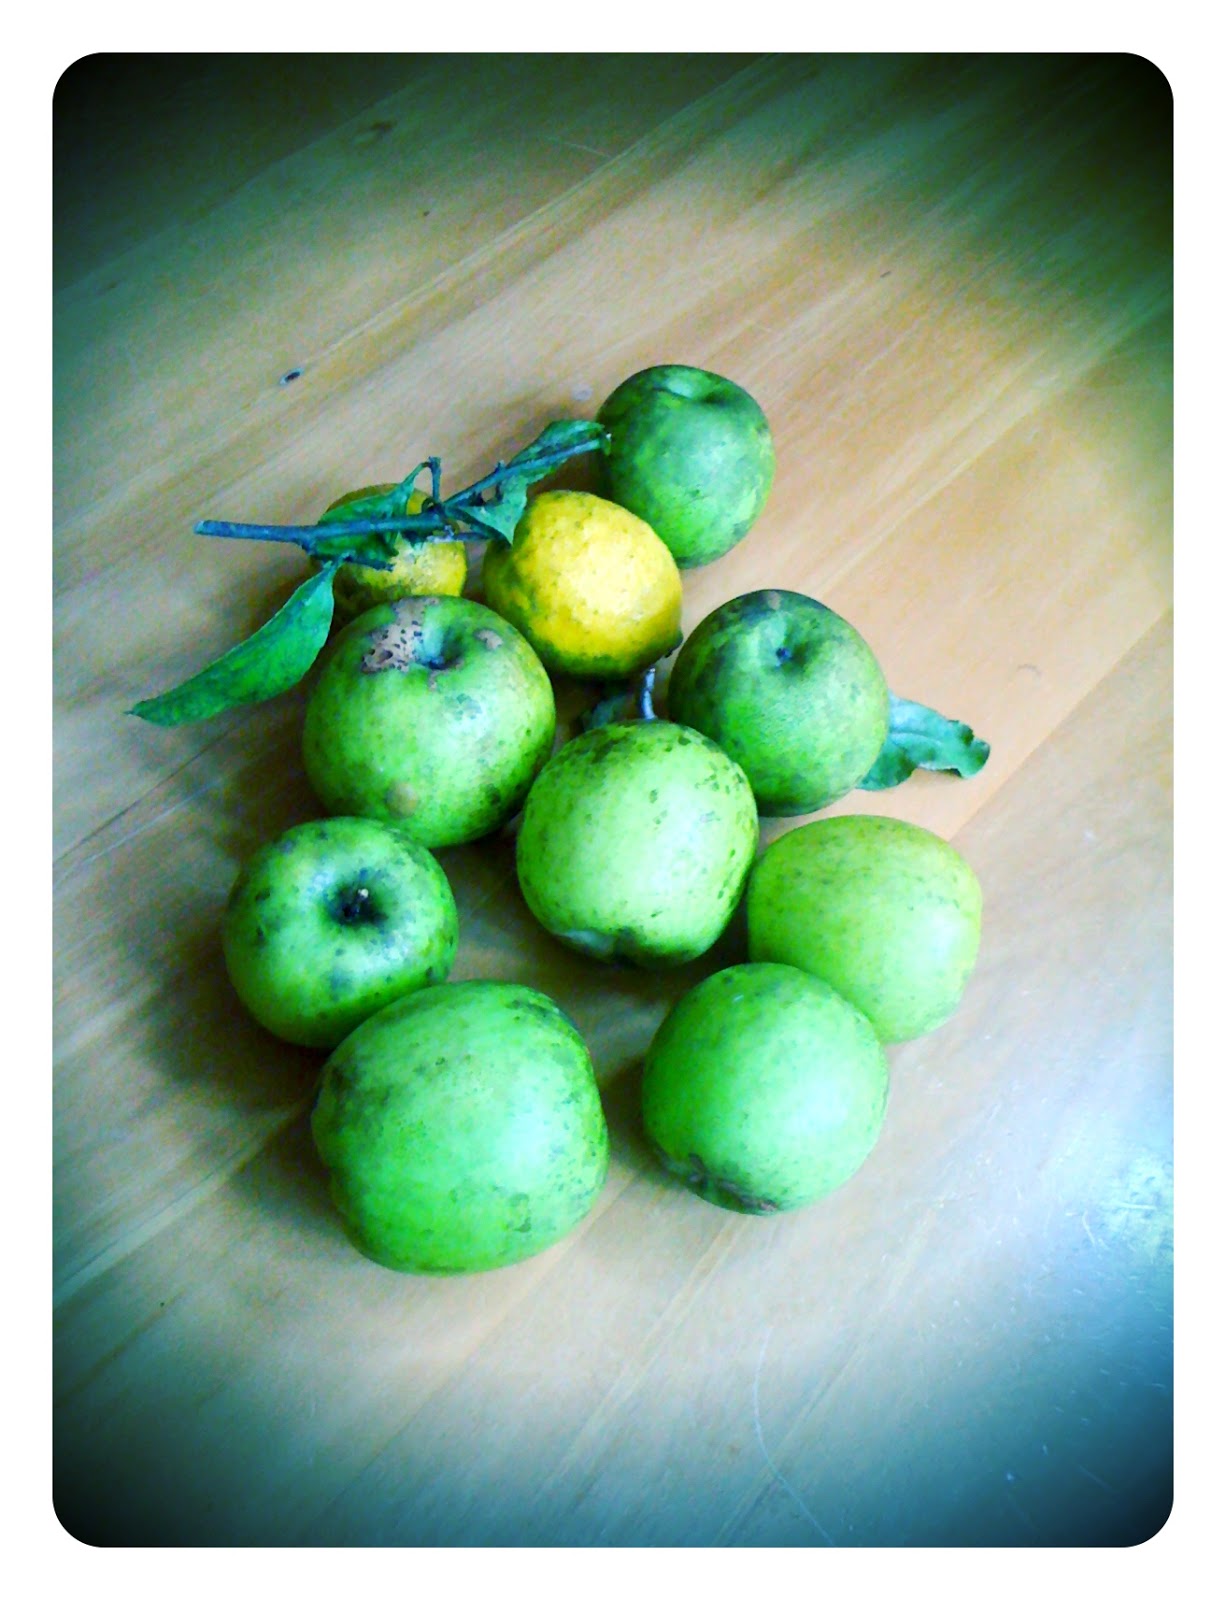
I got a few more Oratia heirloom apples (and a few garden lemons too) from Sue, this is still the season for apples in New Zealand! First I made an apple cake, I like to eat apple cake for breakfast, and I took advantage of the fact that I had a German wwoofer staying with us to indulge: she also liked cake for breakfast, something that in New Zealand is not really done!


Apple and Sultana Cake with Rum


The base for this cake comes from my book Sweet As..., it is the base for most of my fruit cakes, and the original recipe is on page 28, where is used for a cherry berry cake. I start by mixing 4 eggs with 200 g of sugar, then I add 150 g of melted butter (salted), 250 g of self-raising flour, and the zest of one lemon (optional). In the meantime I peeled and cut 4 apples and splashed them with lemon juice. I also soaked 2 tbsp of sultana in a little Guatemalan Rum (Ron Botran, the best!).


I added the sultana and apples for last, and folded everything. I poured the mixture in a 23 cm round baking tin lined with baking paper, and baked the cake at 180°C for approx. 45 minutes. 


When the cake was cool I decorated it with icing sugar and homemade sugar flowers, the German girl and my daughter really liked it, I guess that it was very 'girly'! Also it was perfect for breakfast (the rum is just a taste, no alcohol remains really!), probably I would not make it for a dessert or a special occasion, but definitely for more breakfasts (or after school snacks) to enjoy with a hot drink. There was some left when Kiwi blogger Sasa came to visit, I hope she liked it, she must be used to European having apple cake for breakfast!


Dolomiti Apple Strudel


This is my favourite apple strudel, once again from my book Sweet As..., page 20. I learned to make this from my mother, and I like it because it is 'rustic', not fancy like the patisseries' versions, and barely sweet: a real Dolomiti mountain food. In fact I prefer this to any other apple pie or cake or flan!
For the filling peel and slice 4 apples, add 1 tbsp of sultana, a few chopped walnuts (mine were from the South Island) 5 to 10 cloves (according to taste), 1 stick of cinnamon broken into two pieces, 4 tsp brown sugar, and the juice of 1 lemon.


For the pastry mix 200 g of flour with 50 g of butter (cubed, vegans can use margarine), 2 tsp brown sugar and 100 ml cold water. Mix well by hand and shape into a bowl. Refrigerate for 30 minutes then roll out into a large oval, as thin as you can manage. Spread the apples on top and roll up. Pinch both sides of the strudel and turn them in to resemble a gigantic croissant.  Place on a baking tray lined with baking paper and bake at 180°C for almost one hour.


When the strudel is almost done the juices from the apples will start to come out: remove the strudel from the oven and with a spoon collect the juices and used them to coat the crust. Then place back into the oven for 5 or 10 more minutes (or until you are satisfied with it, I like it not too brown, my mother likes with a really crispy crust). The two little ends are quite dry (just pastry) and possibly I wouldn't offer them to guests, but when I was a child my brother and I used to get one each: we loved them, and we still do (although he is in Italy, so I can eat both ends!!). 


Serving tips: my husband (the Kiwi) likes this strudel for pudding, with cream, but for me this is, once again, the perfect breakfast (no cream!).


Photos and Recipes by Alessandra Zecchini ©

Saturday, July 9, 2011

Gluten free Almond and Chocolate Fingers


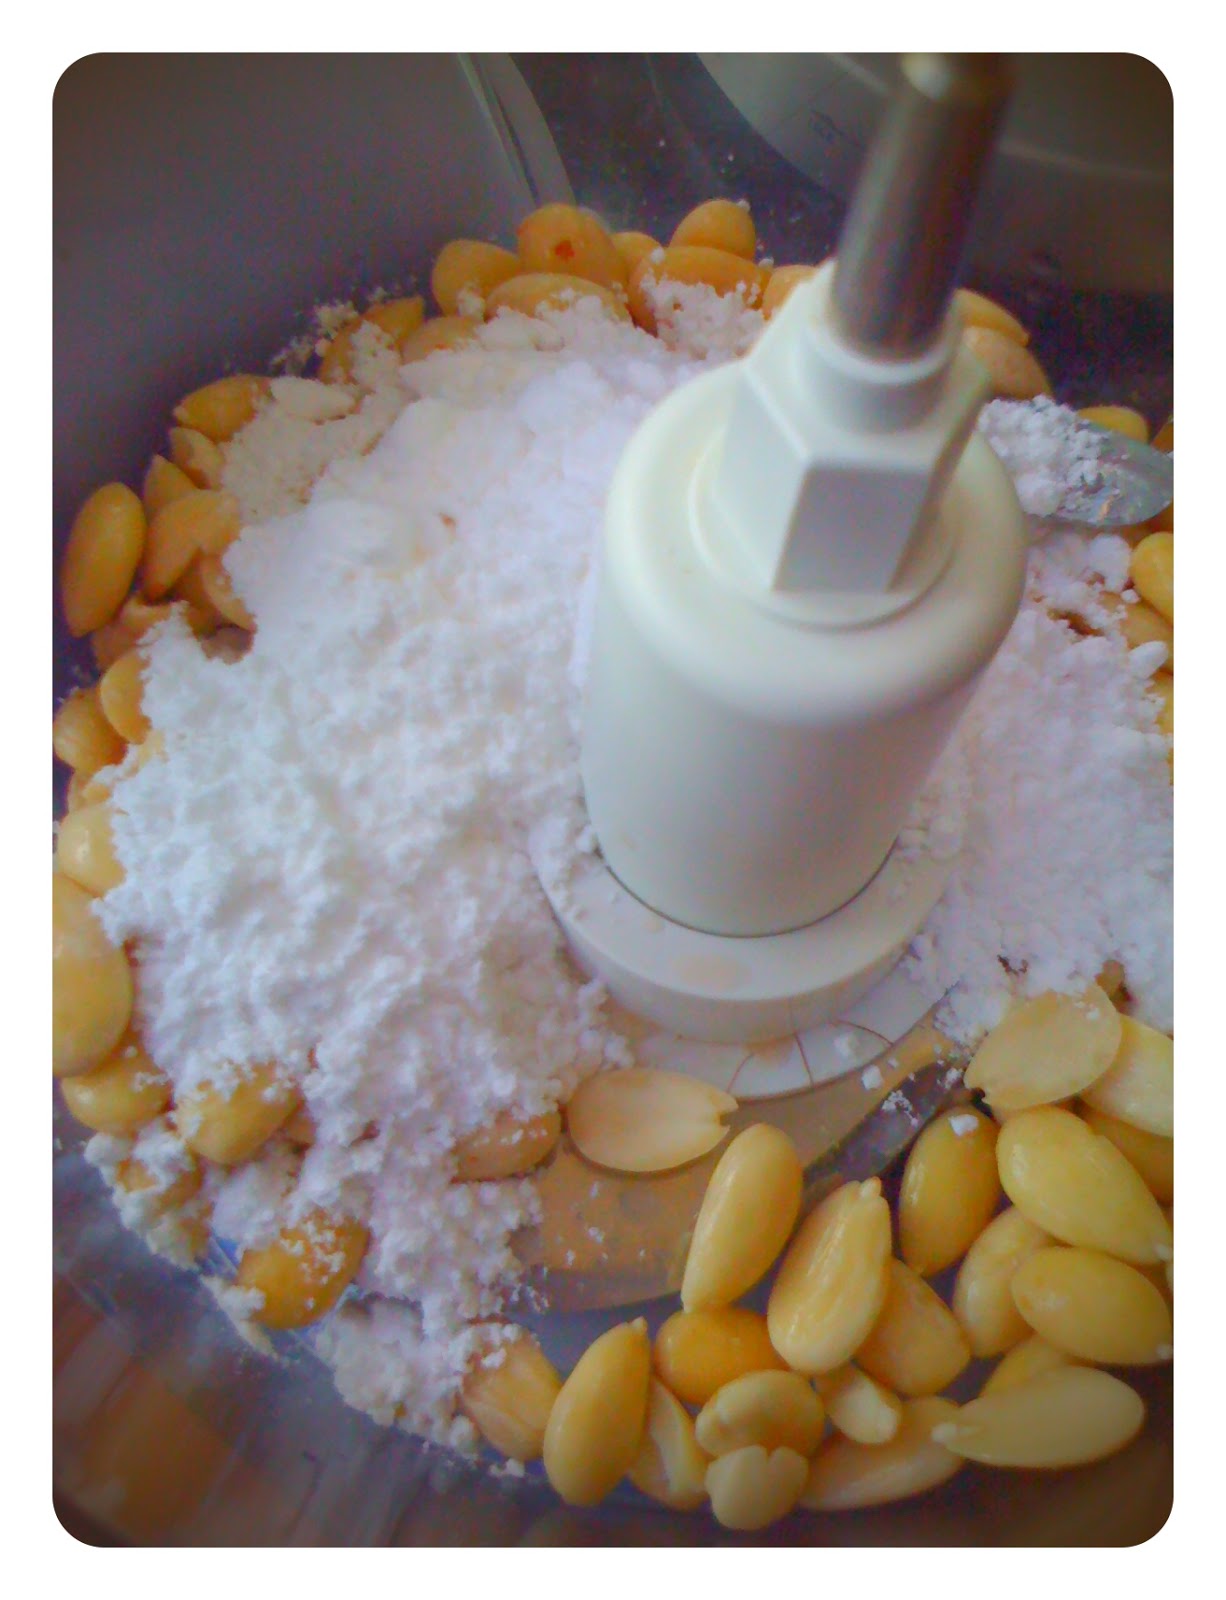
For these I used 200 g of almonds and 5 apricot kernels (enough to give the almonds a more distinctive flavour). If you like to know more about apricot kernels click here. I blanched everything in boiling water for a couple of minutes and then I removed the skins.


I placed the blanched almonds (and the blanched apricot kernels) in the food processor with 100 g of icing sugar. I processed the nuts but not into a 'flour', more like into a coarse mixture, like a crumble mixture. I stirred in one egg white (not need to beat it first, these are not amaretti biscuits), and then I shaped the 'fingers' with wet hands. More than baking, these biscuits need to 'dry', so I placed them in the fan oven at 180°C for 5 minutes, then I turned the oven off and let them dry until they were cold.


To finished I melted some dark chocolate (72%) and dipped one side of the biscuits into it. Once the chocolate had set the 'fingers' were ready. Perfect for tea and coffee, and very high in protein! 


Photos and Recipes by Alessandra Zecchini ©


I am 'recycling' and entering this recipe for Sweet New Zealand, for the month of February 2012, hosted by Shirleen of Sugar and Spice


Friday, July 8, 2011

Vegan Huhu Grubs


Sometimes I am really happy to be a vegetarian: it means that I don't have to try wild specialties like huhu grubs. Not that many New Zealaders would either, you can't buy them in shops (I think) and you have to forage for them in the bush (they eat rotten wood) or go to special wild food festivals like the Hokitika Wild Food Festival. But I found a better, and vegetable alternative, with New Zealand yams.


Yam are much bigger than huhu grubs, and I got the red and the apricot colour varieties, I thought that they looked really pretty. After boiling them the colours had faded, a lot, and the look was... well, like in the photo above. I left them on the kitchen bench and went to get the kids from school. As soon as they arrived home the went" "Huhu grubs????". No, they have never eaten them, but they saw them and know what they look like. They giggled a lot, they said that yams really looked like gigantic huhu grubs.


Just boiled they didn't appeal to me, so I roasted them with olive oil, smoked garlic, smoked salt, coriander seeds and a few chili flakes. Then I served them with some wasabi mayonnaise (just mayo mixed with a dash of wasabi) and they went down a treat. In this household my husband is the only one that has ever eaten huhu grubs, I asked him if the flavour was similar to these yams, he said: "No, these taste much better!"

Photos and Recipes by Alessandra Zecchini ©


Thursday, July 7, 2011

Bloggers be aware of plagiarism in New Zealand


It is sad to have to write posts like this one instead of a recipe, or posting images of lovely landscapes, but I feel that it needs to be done.


Today I would like to invite you, especially if you are a New Zealand food blogger, to visit Johanna from Wild Picnic and read her post Puha and plagiarism?
I heard a few stories about plagiarism among bloggers overseas, but this beats them all: what Johanna and others have experienced here is having their recipes taken without being credited or even asked about it, used to make a popular New Zealand TV show (often claiming that they were the creations of the TV show presenters) and then put on the show website.


Now I know that recipe copyright is a feeble issue, you just need to change a few ingredients or dosages or methods, and you are ok (although bloggers' etiquette requires that you cite the original source of inspiration), and many researchers do just that. Not here, here some entire texts have been cut and pasted from one site to another, whoever did it didn't even bother to change a word or two. What were they thinking??


I can only say these two things to the TV show recipe researchers:


We may not be able to claim copyrights on a recipe idea, but we can on text,


and


Remember that if you copy from the net the truth is only one click or two away.


I heard of similar things happening overseas, at one stage some Italian bloggers were talking about it so much that it has created a network of solidarity: now as soon as a recipe/text is copied they all contact each others, write posts and talk about it, and the word spreads, fast. Our best defense is solidarity and collaboration, there are quite a few bloggers in NZ now, networking already, and if we are all aware of what is going on we can keep a check on this and make sure that it doesn't happen again.


I would really love to know your opinion about this, and also invite you to show your support to Johanna and any other blogger that has his/her words stolen away. And to the producers: it is so easy to put a link, cite a source, and say thank you for the recipe. After all a show that it is liked by bloggers always gets more followers and free publicity!

Update: wrote this in the comments, but just in case you missed it: the recipes have been removed from the website in question. I am sure that this is a positive start, and I would like to thank again Johanna for her courage and generosity in sharing the information. Thank you also to all that replied, and left a comment on Johanna's blog too. :-)

Tuesday, July 5, 2011

How to Make Hazelnut Turkish Delights, and Pistachio, and Lavender, and Orange Blossom, and...


Yesterday I wrote about making Rose Turkish Delight (Lokum) at home, it is pretty and pink, but I must confess that my favourite Lokum of all is hazelnut, so today I will show you this variations, and a few more. To start follow the recipe here.


Rose Turkish Delight


While the cornflour and sugar syrup are cooking shell and toast a couple of handfuls of hazelnuts. It is better to use fresh hazelnuts and toast them just before making Lokum, for a full hazelnut flavour. Years ago I also had a hazelnut essence which was great, but I cannot find it here, I think that one of the best places to buy it would be in Piedmont, in Italy. Anyway, even without hazelnut essence you can get the best out of hazelnuts if you toast them and use them within a few days. When they are still hot from the oven put them in a clean tea towel and shake and rub them well so as to discard the peel. If some peel stays on don't worry, it is edible, just not as nice. Crush the nuts roughly (I have a nut crusher that my Mother-in-law gave me as a present, very handy for these jobs), and when the Turkish Delight mixture is ready, instead of adding rose water and berries, add the chopped nuts. Mix well and then follow the same steps as for the basic recipe.


A few variations:

Pistachio: same as hazelnuts, but it is also possible to blanch the nuts to remove the skin (for greener pistachio). Almonds could go too!

Orange Blossom: Same as Rose, but add Orange Blossom Water instead or Rose Water, and no need to add berries to colour these: they should be clear.

Lavender: when you make the syrup add a few lavender leaves (yes leaves) and then remove them before pouring the syrup into the cornflour mixture. Your Turkish Delights will smell and taste like lavender. For colours add a few blueberries, they will melt in the hot mixture and give you a light lavender colour.

Lemon and other citruses: Easy, add lots of lemon juice and/or zest (or the juice of your favourite citrus fruit) when you make the sugar syrup (there is also lemon essence, if you like).

And then... endless, there is mint (but I am not keen on that one) and so many more, let me know if you make a special one.


Hazelnut Turkish Delight


Photos and Recipes by Alessandra Zecchini ©

Monday, July 4, 2011

Home Made Rose Turkish Delights (Lokum)


Before I start I would like to say that I don't have a sugar thermometer, essential if you are really into confectionery, and that I didn't use much sugar for these Turkish delights. Many recipes use much more sugar, and it is not that I wanted to make a low sugar treat here (it is still pretty sweet), it is just that making it at home really makes me realize how much sugar there is already in my diet, and if I can have something with a little less... well, why not!

This method is 'home friendly' i.e. these can be made at home with very little effort and equipment, and the recipe comes from my book Sweet As... where I also have the recipe for lavender and orange blossom Turkish Delights.

Ingredients

1 l water
300 g sugar
2 tbsp lemon juice
100 g cornflour (corn starch)
1 tbsp frozen raspberries
1 tbsp rose water
icing sugar (very little) and cornflour (lots) to dust.


In a pot put half of the water (500 ml) with the sugar and lemon juice and bring to the boil. Boil it down until you get a light syrup (here those with the sugar thermometer will go to about 240 degrees, I just waited for the mixture to thicken a little). In another pot mix the remaining water with the cornflour, then bring to the boil and simmer, stirring, until the mixture thickens. Add the hot sugar syrup and stir well.


Now let the pot simmer, without stirring, for at least 30 minutes. More would be good, if you are patient, 45 minutes to one hour is more like the shops do it, but in a home kitchen looking at a bubbling mixture is a little worrying. Still, the more you cook it the harder your Turkish Delights. At the end add a tbsp of rose water, and to colour it, since I try not to use artificial colouring, a few raspberries. The berries will 'melt' in the hot mixture and the little seeds are quite pretty, I think. If you don't like the seeds, just pass the berries through a sieve, and adde the juice only. Pour the hot mixture into a square or rectangular tupperware or similar plastic container (easy to detach the solid block after it sets) and let it cool down and set overnight.


The day after tip out your 'candy' block and cut into pieces. I now understand why when you buy lokum it is full of white powder: it takes lots of cornflour to keep it! To dust it I use a mixture of cornflour and very little icing sugar: if you use too much icing sugar the sweet may 'sweat' and become all sticky! Another problem is humidity: it is very humid here in the Auckland bush, if your sweets seems too 'wet' after cutting them, place them on a oven tray and bake them at 50 on fan for a little to dry. Store them in layers divided with paper, and dust regularly with a mixture of cornflour and icing sugar to keep them dry. Eat within a few days. Turkish Delights are Vegan and Gluten Free. Next post will be about hazelnut Turkish delights :-).


Photos and Recipes by Alessandra Zecchini ©


Friday, July 1, 2011

The Arataki Visitor Centre in the Waitakere Ranges.


Views from the Arataki Visitor Centre, a geko and the wooden path among the native trees

A little note from New Zealand today: 15 minutes drive from my house there is the beautiful Arataki Visitor Centre. We come here often when we have guests and wwoofers, to enjoy the beautiful views of the Waitakere Ranges.

11m high pou (guardian post) o Te Kawerau a Maki and more Maori carvings inside the Visitor Centre

The Centre is open to all and has beautiful carvings, artifacts, a kids' area and displays about the history and nature of the Waitakere Ranges. There is also a tourist information desk and a shop.

Bush walks around the Arataki Visitor Centre, brush and spray your boots before entering the forest to protect the Kauri trees from disease. 

From the centre there are some easy trials in the forest, including a plant identification loop. Come and visit me and I will probably take you to this place :-).

Photos by Alessandra Zecchini ©


LinkWithin

Related Posts with Thumbnails