Showing posts with label Tomatoes. Show all posts

Thursday, October 5, 2017

Super quick gnocchi alla Sorrentina


Sorry if I have not posted for a while, the Festival Italiano kept me busy!
And when I am busy I often use pasta or gnocchi from a packet (sorry Mum!).
Here I used Divella gnocchi and Mutti Passata, staples in my kitchen!

Boil a big pot of water, add salt (when it boils) and then the gnocchi, and stir. In the meantime heat the Mutti Passata in a large pan, add a pinch of salt and a drizzle of olive oil. When the gnocchi raises to the surface of the water remove them with a slotted spoon and place them into the pan with the passata. Stir well then add pieces of mozzarella or bocconcini, fresh basil, more olive oil and a freshly ground black pepper. If you like you can cover the pot with a lid until the mozzarella melts (or place in the oven). It takes just a minute or two, but I like to serve immediately and then let the mozzarella melt in the plates with the hot gnocchi.

This is very yum, but my boy likes to add Parmigiano too... what do you think? I'll go for it :-)


Photos and Recipes by Alessandra Zecchini ©

Saturday, March 18, 2017

Schiacciata con pomodorini - cherry tomato schiacciata, and a meal from the garden


I had a great summer of red and yellow cherry tomatoes, the reds are always the best for flavour, but the yellow are pretty to look at and I like a contrast of colour on my plate, so why not! This schiacciata is easy as it doesn't need muck kneading.

For the schiacciata:
Place 300 ml warm water in a large mixing bowl, add 2 tsp active yeast granules and 1/4 tsp raw sugar. Wait 5 minutes then add 500 g high grade flour and 1 tbsp wheat gluten flour, plus a good pinch of salt. Mix well then dust with four, cover with cling film and let it rise for 2 hours. After 2 hours place a little olive oil on your hands and then gently mix the dough, pick it up and place it on a baking sheet cut so that it will fit you over tray (I have a 90cm oven so one long tray is good for me, for a standard oven divide the dough into two pieces). Roll the dough to cover the baking paper and then place on the baking tray. Brush with more oil if you like, then cut the cherry tomatoes into halves and place over the down, pressing them down lightly. Sprinkle with salt and oregano (chopped garlic too if you like).


Bake in a pre-heated oven at 200° C for approximately 20-25 minutes, or until you can see that the bread is baked on top and on the bottom (lift to check). Eaten warm is fantastic, but it keeps well for a couple of days, or at least, it would, but we tend to eat it pretty quickly! 


We had it for dinner with a Caprese salad (cherry tomatoes again, mozzarelline, basil and borage flowers) dressed with olive oil and salt, plus flat beans from the garden (teghe) boiled and dressed with balsamic vinegar, olive oil and salt (my daughter loves these!) and a simple guacamole (avocado, garlic, salt and lemon juice, made in the nutribullet!).

This is a perfect meal for me!


Photos and Recipes by Alessandra Zecchini ©

Friday, March 10, 2017

Two variations on Caprese Salad

Caprese with edible flowers and Caprese with tree tomatoes and two basils


Caprese is probably one of the world best known salads (and antipasto), and there are many variations, so here a couple more:

Caprese with edible flowers

I used red and yellow cherry tomatoes, and mozzarelline (the cherry size), plus added some edible flowers (borage and dianthus from my garden, organic of course). Add small basil leaves too before serving, if you like. Suitable also for a cocktail party, and ever so pretty!

Caprese with tree tomatoes and two basils

I used a mixture of vine tomatoes, cherry tomatoes and semi-dried tomatoes, mozzarelline (but you can use regular mozzarella cut into slices or pieces) and green basil and purple basil leaves. Dress with olive oil and salt. A filling salad or light lunch.

And now some pictures from my garden!


Photos and Recipes by Alessandra Zecchini ©

Wednesday, October 26, 2016

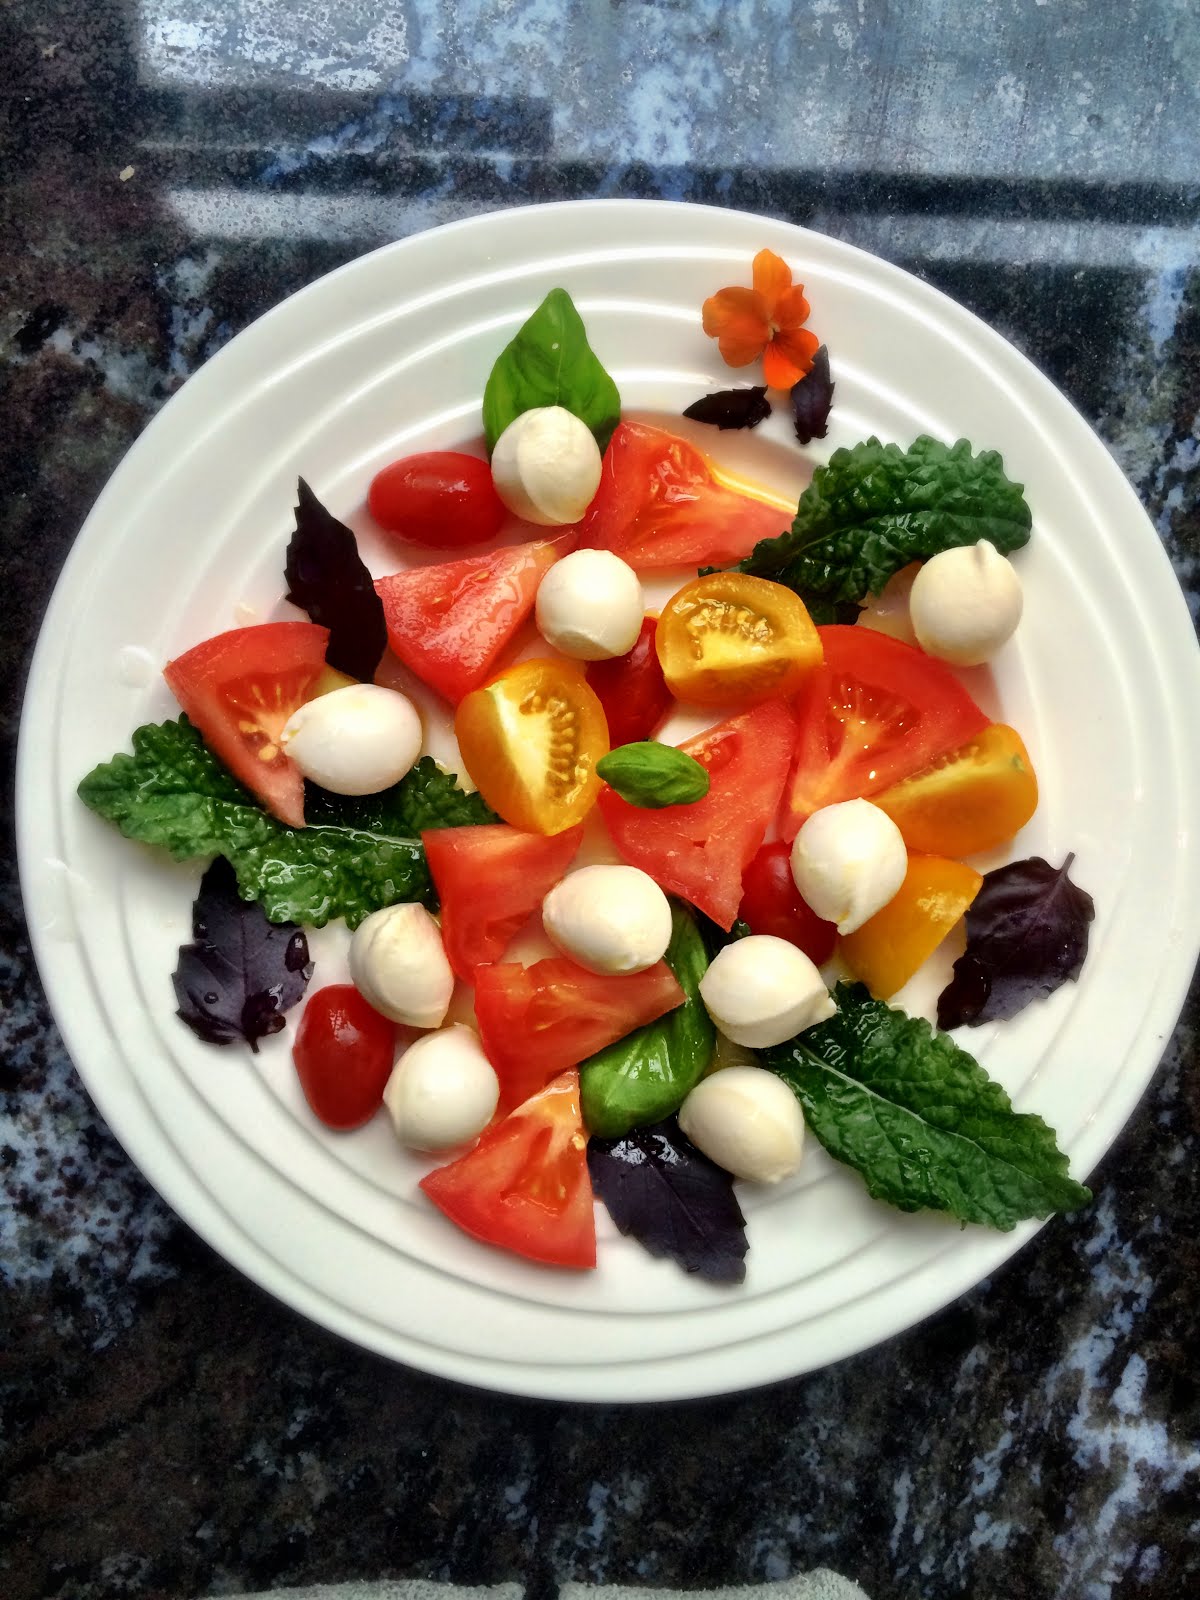
Caprese with three types of tomatoes and two types of basil


The weather has been strange, one moment sunny and then rainy again, and I needed a colouful salad to keep me happy! So here is a Caprese with bocconcini, and I used cherry tomatoes, beef tomatoes and yellow tomatoes, plus green basil and purple basil. And a few very young leaves of cavolo nero from the garden :-). Drizzle with olive oil, add a pinch of salt, and the sun is shining!


I have prepared my reading deck, with flowers and all...


And cut the lavender to dry for scented sachets… but now it is raining again… never mind! Spring in Auckland!


Photos and Recipes by Alessandra Zecchini ©

Wednesday, May 27, 2015

Cherry tomatoes with raw nut cheese and edible flowers


After the raw vegan mushroom and nut macaroons here is another cute raw vegan appetizer! Make a cross incision at the base of cherry tomatoes, stuff with some raw vegan nut cheese (recipe here) and decorate with herbs and edible flowers. They taste so good and are incredibly pretty!

Photos and Recipes by Alessandra Zecchini ©

Sunday, July 27, 2014

Gustoso: a dish by Alessandro


I have a special guest post today, a dish prepared by my 5 years old nephew Alessandro (pictured on the left, stirring risotto!). He named his creation 'Gustoso' and it looks yummy and also super healthy, even vegan and gluten free! Carrots, sun dried tomato, olive oil and rosemary. Bravo Alessandro! Un bacione dalla zia!


Alessandro making zucchini trifolate: zucchini, olive oil, salt and garlic


Photos by Emanuela Sias and Recipes by Alessandro Zecchini ©

Saturday, May 10, 2014

Bruschetta Caprese


I feel like one of those fancy New York bloggers publishing this, as it isn't really a recipe but just a snack, or a quick summer lunch, and mostly it isn't something new and original, probably all the Italian bloggers are giggling too: hahaha Caprese salad, how original!


But I just got a new iPhone and I couldn't wait to try the camera out, after all I seem to use my phone as much as a camera as for making calls! For the 'recipe': well, just toast some nice crusty bread, rub with garlic if you like (not really necessary for a Caprese though!) top with mozzarella, tomatoes and basil, and then sprinkle with salt and a drizzle of extra virgin olive oil. The basil and the black and yellow tomatoes are from my garden, the red ones aren't, no more tomatoes now, but they are still cheap in the shops, and relatively tasty, so I hope to enjoy this kind of salad (or bruschetta) for a few more weeks yet!


Photos and Recipes by Alessandra Zecchini ©

Friday, April 25, 2014

Italian tomato passata made with a sieve


After the arrabbiata post I was asked what I mean by 'putting' the tomatoes through a sieve.
Well, traditionally in Italy we put the tomatoes through a vegetable mill, but I don't have one so I use a sieve. The skins and most of the seeds are left behind (or all the seeds, depending on the mesh of your sieve), and the sauce (passata) gets through. This, to me, is the best sauce in the world! Of course you need to cook the tomatoes first (maybe with garlic?) then put the tomato 'mush' through the sieve and back into the pot to cook until thick. Then I just add salt, olive oil and basil and serve, possibly with spaghetti! It takes time, but it is worth it!


Photos and Recipes by Alessandra Zecchini ©

Tuesday, April 22, 2014

Arrabbiata sauce and what works best to stop chili burning


I pulled up my tomato plants, no more fruit now, and with all the rain we had the last tomatoes tasted more of water than of tomato! The solution? An arrabbiata sauce! Please note that the chilies here are not mine except for the fat black one (I had two, a couple more still on the plant, not sure if I will ever harvest them though…). 


My son Max loves arrabbiata, one of his favourite sauces, as long as it is not toooo hot. So I just used one chili and put it in the pot with the cut up tomatoes. I cooked the lot until the tomatoes where mashy (most were cherry tomatoes so it didn't take long!), then I put the tomatoes through a sieve and collected the pulp minus seeds and peels. I cooked this until thick, added olive oil and salt, and the sauce was ready. Another way would have been to cook the tomatoes first and then add the chili to the tomato pulp, but this worked well. 


Max fascination with chili led him to do a science project last year (year 8), and it was very interesting for me too. He bravely tried different chilies several times over a course of a few weeks, looking for the best antidote to spiciness. He was very meticolous, repeating the experiments over and over and even asked some of his friends to try (not very successful here though). For each type of chili he checked how many tbsp of water, apple juice, milk, yogurt or rice were needed to take the heat off.


The juice experiment soon became the hardest, as he quickly worked out that sweet fruit juices don't work! Water didn't help much either, since the capsaicin compound is hydrophobic, but these were all things that he had to work out himself, rather than reading them in books. As to be expected the best antidote in the list was yogurt, followed by milk (just above rice, the only solid food in the experiment).


Yogurt goes well with curry, and we often have a lassi drink or a raita when we eat Indian food, but what if the arrabbiata sauce is too hot? We wouldn't put yogurt here! Fortunately all fats work with capsaicin, and olive oil is one of the best, not good to drink, but perfect on pasta :-)

Photos and Recipes by Alessandra Zecchini ©

Sunday, April 6, 2014

Kashmiri Masala chickpeas and potatoes


Manu invited me to a 'Swap' on her blog, and my swapping partner is Billie from Scotland. We had to send each other an ingredient and then make a recipe with it. I sent Billie the Fresh As raspberry powder, and I look forward to see what she will do with it! She sent me some Kasmiri Masala, but because I got it late (I forgot to tell Billie my address, silly me, but fortunately she copied it from the parcel I sent her!). I had a super busy week (which included preparing for a full day TV shoot), and I am behind with my deadline for publishing a recipe! But the best thing about a Masala is that you don't have to sizzle all the spices at the beginning and work out the doses, in fact a masala should be added at the very end, to enjoy the fragrances of the aromatic spices (and the Kashmiri Masala is definitely very aromatic!!). So even if I was running around like mad I managed to throw together something starting with the leftover juice of a peperonata (stewed capsicums with celery, carrot, and garlic).


I had all that wonderful bell pepper's stock left from the night before (we ate all the capsicums and veggies), so I just peeled and cut 5 large potatoes, added the content of one can of chickpeas, and some cherry tomatoes from the garden (make an incision with a knife so that they don't 'explode' during cooking). I added a little salt and then simmered everything until the potatoes were soft. I adjusted for salt and added one tsp of Kashmiri Masala, put the lid on for 2 more minutes on low, and then served my aromatic stew to the family (with some roti and some raita). The only problem is that I don't have a last photo! We ate too quickly before remembering to take one! :-) But I hope that you will like the recipe, and it is super simple!


And for the weekly gardening photo: the last blueberry (I think) from my plant but still quite a few Alpine strawberries coming up, this is what we can pick every two days, not enough for jam maybe, but enough to decorate desserts :-).


Photos and Recipes by Alessandra Zecchini ©

Friday, August 30, 2013

Linguine with broccoli... and some semi-dried tomatoes and feta too!


I love pasta with broccoli, but for this dish I just felt like adding some colour... and fancy that, it looks like the Italian flag! This is not a combo I would do every day, or with all my broccoli pasta (which I prefer plain) but it seems to go very well with Kiwis, who are still keen of having several things on their pasta (never understood why...), and it is easy and tasty too!

Cook the linguine al dente, In the meantime clean the broccoli, cut the stalks into small pieces and the florets in fork size pieces. Heat some olive oil in a pan and add two cloves of garlic, peeled (chopped if you like a stronger garlic flavour). Sizzle the add the broccoli stalks. Stir, after one minute add the florets. Stir for a couple of minutes, add salt, cover with a lid and simmer for two minutes, then turn the element off but leave the lid on: the broccoli will cook in their steam. Cut the semi-dried tomatoes into strips and cube the feta. Drain the pasta and place in the pan with the broccoli (you can add a bit of water from the pasta or a bit more olive oil to mix everything well together. Top with the tomatoes and feta. Serve immediately. 

Photos and Recipes by Alessandra Zecchini ©


Saturday, February 23, 2013

"French" Caprese Salad? Cherry tomatoes, bocconcini and blue borage flowers


I can never get tired of Caprese, the classic tomato, mozzarella and fresh basil salad that represent Italy both in taste and in colour. But just for once, and just for a change, when I picked my cherry tomatoes from the garden I also got a few borage flowers and thought that they may look pretty (and yes, just in case you ask, they are edible), and pretty they did look too! And because this looks more like the French flag than the Italian one, I just called it "French" Caprese.  And I guess it could be a good salad for the 4th of July too if you are in the US. What do you think?


Photos and Recipes by Alessandra Zecchini ©

Monday, January 14, 2013

Tofu with Smoked Paprika and Pomodorini, vegan and gluten free main


This is a great vegan main, full of flavour and proteins. I cooked it for Bence and Judit, they like tofu and they asked for the recipe, so here it is:

Ingredients:

10 pieces of dry tofu (Japanese)
500 ml vegetable stock
2 shallots
4 tbsp extra virgin olive oil
1 tsp smoked paprika (or more, to taste)
1 can Italian cherry tomatoes (I used Mutti)
1 cup of water (to rinse the tomato can)
1 carrot
Salt to taste

I used ten pieces of dried tofu (like this one), soaked in 500ml of vegetables stock. Dry tofu is like a sponge and it will absorb flavors well (so use some good vegetable stock!). Then I sizzled a couple of finely slices shallots with 4 tbsp of extra virgin olive oil, then I added the tofu (soft after soaking in the vegetable stock) and sautéd it on both sides for a minute, then I added one tsp  (well, probably a bit more...) of smoked paprika, sizzled the tofu in the spice for a little longer, and finally one can of Italian cherry tomatoes, one cup of water, and one carrot, cut into thick slices). I cooked everything until the sauce was reduced and quite thick, and the carrots soft.

Add salt to taste and serve. Tofu is yummy!


Photos and Recipes by Alessandra Zecchini ©

Wednesday, October 31, 2012

Eggplant, tomato and mozzarella


I could almost call these mini parmigiana, but there is no Parmesan, so I am not quite sure. Still, same principle, but they are little individual portions, and they look quite good for a party, entree or fancy dinner.

Slice the eggplants and 'sweat' with salt for at least an hour. Rinse and pat dry. At this stage you can either fry the eggplant slices (with olive oil) or grill/bake them. If you fry them they are tastier, but a bit greasy (remove excess oil with kitchen paper) and it does take time! If you decide to grill them or bake them just put them on a baking tray lined with kitchen paper, brush with olive oil and add a pinch of salt. Place under the grill or in fan oven at 180°C until they look cooked on one side, turn them over and cook them on the other side. The grill is quicker, the oven tends to dry them up, so when I turn them I also cover them with more baking paper so that they keep some 'steam'. I prefer the baking method but for special occasions I fry!! Once you have your cooked eggplants add a little Italian tomato passata sauce on top, and a bit of mozzarella (I got mine from Massimiliano il Casaro). Place back in the oven until the mozzarella starts to melt. Serve individually or stack two together (like I did). Top with fresh basil, or fresh thyme or oregano (I used thyme). Eat hot or warm. I had them cold too, ok but not as good as hot! Variations are endless, and they look like mini pizzas, but without the dough!

Photos and Recipes by Alessandra Zecchini ©


Monday, June 11, 2012

Tofu with Bell Peppers, looking for a right English title


Or with capsicums... In the last month I had a larger number of visitors form the US for all of my blogs, and I was asking myself if I am using the right English names for them. There is one person who keeps 'correcting' me ("we call them this and we call them that") so for once (once!) I changed the title!

On the other hand... maybe I could call this recipe Paprika Tofu! :-)


I chopped two stalks of celery, one small onion, and sliced a carrot. I put everything in a large pot with olive oil and sautéed for 5 minutes. I added one yellow, one orange and one red bell peppers/capsicums/paprika and then after 5 minutes I added one can of Mutti tomato pulp (like a thick passata), one cup of vegetable stock and one block of tofu cut into cubes. I simmered the lot for 30 minutes, then I added salt and smoked paprika to taste (quite a bit of smoked paprika actually, I love it!). I simmered everything again until the sauce was quite thick, and then I added some chopped parsley and one more drizzle of olive oil, and served everything with Israeli Couscous (which is similar to Fregola Sarda).

Super red and bright in colour, and flavor!!


With this recipe I take part in the Lagostina contest hosted by Araba Felice in Cucina
in the section "Healthy but with Flavour" for the Tempra pot :-)


Photos and Recipes by Alessandra Zecchini ©


Saturday, March 3, 2012

Leftover rice: two Tians


When I have leftover risotto I make croquettes, when I have leftover short grain rice I make fried rice, and when I have leftover long grain, Thai or Basmati, I make tians. I am not sure why I only use long grain rice to make a tian, it is one of those thing that looks logical to me, maybe because long grain is not sticky enough and so I need to add an egg? Anyway, this is my classic tian recipe:


I grease a terracotta round pan with olive oil. Mix the leftover rice with some cooked spinach (or similar green leaves), add one or two eggs (depending on how much rice I have) and then salt, pepper and nutmeg. Put everything in the terracotta pan and bake until the top is crispy. A bit like a baked rice frittata really!


The other day I had some rice left, but no greens. Also, the rice wasn't Jasmine or Basmati but standard long grain and it was a little sticky. I thought that I could make a tian without egg, a pizza tian!


I greased my terracotta pan with olive oil, pressed the rice down, topped with Italian tomato sauce (recipe here), then mozzarella and oregano. Another drop of olive oil and into the oven to bake!
Certainly a bit more difficult to serve because it doesn't cut perfectly like a tian made with eggs, but nevertheless my kids, who like everything that smells like pizza, gulped it down in no time! Maybe a good gluten free variation to a pizza??

Happy weekend everyone!


Photos and Recipes by Alessandra Zecchini ©

Monday, December 12, 2011

TTT: Taiwanese Tofu with Tomato


Ok, the TTT name is my invention, but the recipe is really Taiwanese. Several years ago I had a Taiwanese baby-sitter, she was also vegetarian (in Taiwan there is a strong vegetarian Buddhist tradition) and she didn't cook with garlic, onion, chives and leeks (this is the old Buddhist tradition). She taught me a lot of recipes... no, not recipes, maybe I should say 'ways of cooking'.

This recipe is so basic that I almost thought of not putting it on the blog, but the fact is that it is quite amazing!! In my Italian brain I never thought of combining tomatoes with tofu and soy sauce this way, it didn't feel right, and I was quite skeptical when she showed it to me. And then I tasted it: WOWOWOW, it works!

And not only it works, the kids love it, and it is so easy and quick... and in a way it feels so ... ethical!
Yes, just a few low cost ingredients, not much time or energy needed, and lots of proteins.

I usually used some red ripe tomatoes, but I had some ripe little orange tomatoes to finish, and so they went: cut and placed into the frying pan/wok/pot with a little vegetable oil (olive oil works well) and a small pinch of salt. Of course you could also add garlic, but the original recipe, as I said before, doesn't allow for allium of any type. Cook on high, stirring constantly, when the tomatoes start to mush into a sauce add the cubed tofu, stir and then add one or two tbs of soy sauce (I use only Japanese soy sauce, Kikkoman or Yamasa) and stir until the tofu is really hot (a couple of minutes only). Top with fresh chopped coriander if you like, and serve immediately with rice or noodles.


Photos and Recipes by Alessandra Zecchini ©

Tuesday, June 21, 2011

Pizza al trancio con pomodorini in scatola


Since recently there has been some talk about bloggers' getting payed or sponsored, I better just say that I didn't get payed, not receive canned tomatoes for writing this :-). This recipe is for Cucinando con mia sorella's contest. As it happens tomatoes are not in season in New Zealand, and I actually use Italian canned tomatoes from Mutti.


As a matter of fact I have been using Mutti since I left Italy, when I could find it, that is! It was ok in London, more difficult in Japan, and now I can get it in New Zealand and my pantry is a bit like the one of an Italian immigrant: dry pasta and canned tomatoes better came from Italy!


For this pizza slab I used the canned cherry tomatoes. I made the base (recipe here) but also added a tbsp of wheat gluten (these days I find that High grade flour is not 'strong' enough for making pizza). After 2-3 hours I rolled the dough on a large baking tray, then I put the canned cherry tomatoes on top. This way when the dough rises the tomatoes stick to their places. If you put them on just before baking they may roll off.


After 30 minutes (the dough had risen quite a bit) I added the tomato juice from the can, salt, olive oil and oregano. I baked the pizza in the oven at 240°C for 15 minutes, then I added black olives, cheese (I used edam, as I didn't have mozzarella) and artichokes in oil. I put the pizza back into the oven for other 10 minutes. Ready!


Photos and Recipes by Alessandra Zecchini ©


LinkWithin

Related Posts with Thumbnails