Showing posts with label sweet. Show all posts

Friday, March 13, 2026

Dolcetti alle mele - apple cupcakes/muffins


Ingredients for 12 cupcakes/muffins

3/4 Oratia apples
40 ml water
10 ml lemon juice
A pinch of ground cinnamon
3 cloves
120 g salted butter
3 eggs
130 g sugar
A few drops of pure vanilla essence (optional)
200 g self-rising flour
Granulated sugar to top, or icing sugar to finish (optional)


Preheat the oven to 175°C. 

Line a 12-muffin tray with cupcakes paper cups.

In the meantime place the water and lemon juice in a mixing bowl, peel and slice the apples and drop them directly into the lemony water.

Melt the butter in a jug, in the oven (while the oven is warming up for the cupcakes). Place the eggs and sugar in a mixing bowl and whisk, using an electric beater, until the mixture looks light and pale yellow in colour. Slowly add the melted butter and the vanilla essence, if using.

Drain the apples (keeping the water) and remove the 3 cloves.
Keep beating the mixture at a low speed now; add half of the flour followed by half of the lemony water from the apples. Add the rest of the flour and water and keep beating making sure that there are no lumps. Divide half of the mixture into the cupcakes paper cups.
Add the apples and then cover with the rest of the mixture. 
Bake for about 18-20 minutes, until golden brown at the top.

I had some Italian granulated sugar so I sprinkled it on top, but it is not necessary, and I have never seen it sold in New Zealand. A sprinkle of icing sugar will do.


  Photos and Recipes by Alessandra Zecchini ©

Monday, September 8, 2025

Crostata di marmellata di more e lamponi


I mede a lot of jam this Italian Summer, from fruit that I foraged and also picked from the garden.
Foraged: raspberries, blueberries, blackberries.
Picked: red currants, yellow plums, cornelian cherries.

I gave away some jam because I cannot take it back to New Zealand, but also made several crostata, Italian jam tarts, and this one has two jams: half raspberry and half blackberry. 

Ingredients:
100 g butter
100g sugar
300g flour
1 tsp of baking powder
1 small glass of Sassolino 
(this is a local aniseed liqueur, you can substitute with Sambuca, or with your favourite liqueur)
2 eggs
jam to fill


Mix the butter with the sugar, then add the other ingredients in order and mix. You will get a soft sticky dough. Keep about a fifth of the dough aside for the topping, and spread the rest in a tart pan based with baking paper. You cannot roll this dough with a rolling pin, it is too soft, you must spread it on the base and borders with your fingers. It may sound strange but this way you will get a crostata base that is not dry (as it often happens!).


Add the jam (or jams, in this case)


Roll the remaining dough into thin strips and place over the tart. Because this recipe has baking powder the strips will become larger during baking, so make them thin.


Bake at 180°C fan oven for about 45 minutes. Let it cool down completely before lifting out from the baking pan.


And here another one I made with yellow plum jum!


Photos and Recipes by Alessandra Zecchini ©


Friday, November 25, 2022

Ricotta cake with fresh redcurrants - Ciambella alla ricotta con ribes rosso


From my book Sweet As... ciambella alla ricotta. Ricotta ring cake. Usually made with jam filling, this time I added fresh redcurrants, it was great!

Ingredients
250 g ricotta
300g sugar
3 eggs
300 g self raising flour
grated ring of 1 lemon
1 cup of cleaned fresh redcurrants

The original recipe is in my book Sweet As...


Here is a quick explanation: cream together the ricotta and sugar, then add all the other ingredients following the order in the ingredient list. Bake at 180C for approximately 40mins. Sprinkle with icing sugar and decorate with fresh redcurrants.

 Photos and Recipes by Alessandra Zecchini ©


Tuesday, May 10, 2022

Vegan and sugar free chocolate mousse


I am on a diet but really wanted some chocolate for Mother's Day, something mostly raw, low carb and healthy. This dessert is so easy and delicious that I made it two days in a row, once with hazelnuts and once without. I'll share the basic recipe:

12 dates
a little water to cover the dates
1 heap tsp cocoa (I used Dutch cocoa)
half tsp vanilla essence
1 firm avocado
berries to decorate

Remove the stones from the dates and place in a nutribullet or blender and add enough water just to cover them. Soak for 20 minutes, then add cocoa (a real heap tsp of it) and vanilla. Blend. Add the avocado, sliced, and blend again. Divide into three serving bowls or glasses, top with berries (frozen ok) and refrigerate until serving time. Decorate with edible flowers if you like, I used Alyssum here. If you want to add hazelnuts you will need about 8, toasted and grounded, to add to the date mixture. 

My husband couldn't believe that it was made with avocado and no sugar! The texture is just like a mousse, you can increase lightly the cocoa for a more bitter-chocolate flavour, increasing the dates (or using dates that are too big) will make it sweeter but may give out more of a date rather than cocoa flavour. If the mousse is too thick add a drop of water and mix again.

Photos and Recipes by Alessandra Zecchini ©


Monday, April 25, 2022

Feijoa cake


👩🏻‍🍳about 20 feijoas, 3 eggs, 200 g sugar, 80 g butter, melted (I used salted butter, if you use normal butter add a pinch of salt to the mixture), 200 g self raising flour and a drop of pure vanilla essence. 

Cut the feijoas in two halves and remove the flesh with a teaspoon. Set aside. Beat the eggs and sugar first until the mixture is pale yellow, then add the butter and, little by little the flour. End with vanilla. Stop beating and fold in the feijoas. Pour into a greased or lined baking tin (20cm is good) and bake at 180℃ for about 45 mins (until a toothpick inserted into the centre of the cake comes out clean). Tip upside-down on a serving plate while still hot, the feijoas tend to go to the bottom so I keep the cake upside down to have them at the top. Dust with icing sugar and let it cool down completely before serving (so that the base of the cake will flatten nicely). Yum with cream or mascarpone!

Also, did you know that you can eat feijoa flowers too? Find out more here


Photos and Recipes by Alessandra Zecchini ©


Sunday, March 20, 2022

Ricotta with strawberries, manuka honey, edible gold and cornflowers


I have been on a diet recently so this is a pretty low-fat dessert: ricotta with strawberries marinated with lemon juice (a mixture of regular strawberries and tiny Alpine strawberries from the garden) and a tiny little bit of mānuka honey. For best effect the dessert is decorated with edible gold and cornflower petals. It was stunning to look at, and delicious!


 Photos and Recipes by Alessandra Zecchini ©

Monday, January 10, 2022

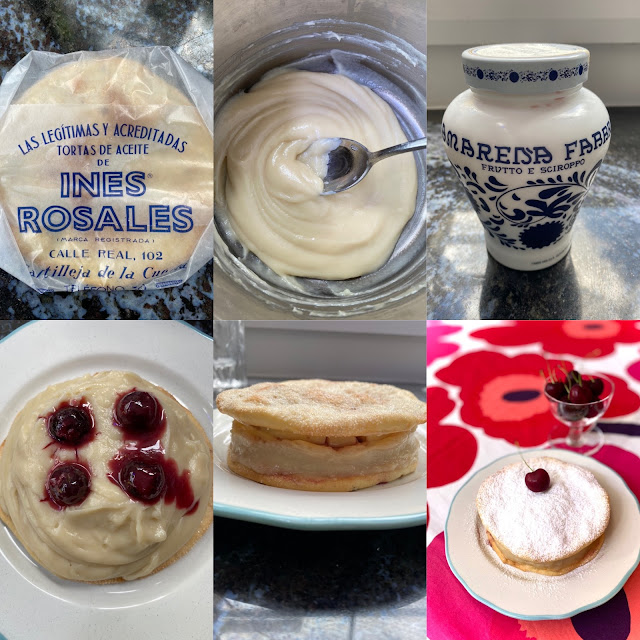
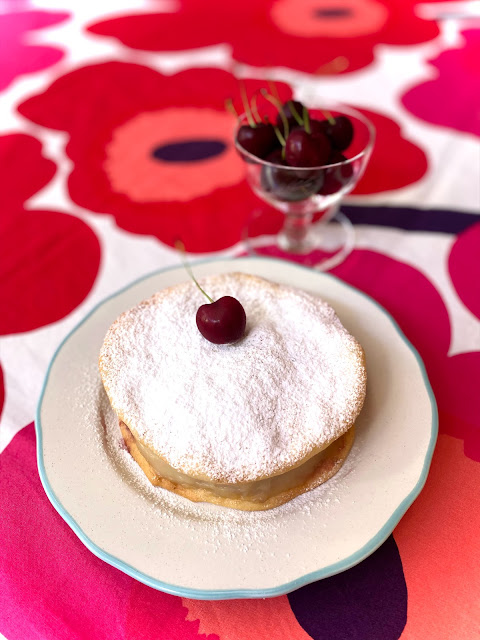
A round vegan custard slice, step by step


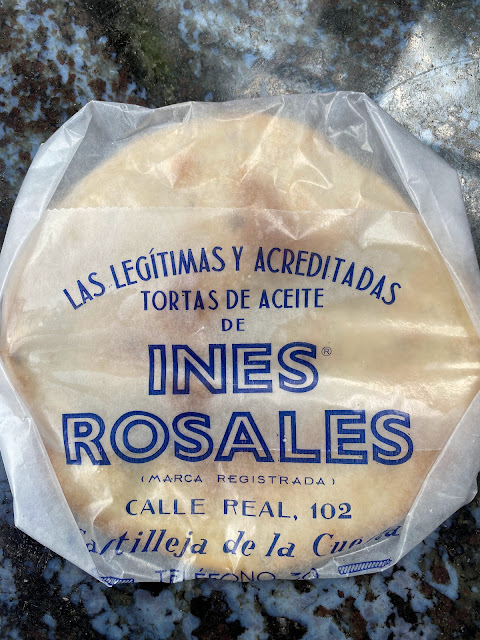
Thanks to my friend Ray I have recently discovered these sweet Spanish Ines Rosales' tortas (there is also a savoury version). And noticing that they are vegan I thought of making a quick dessert, a bit like a custard slice, which I love, with them!


For the custard I used oat milk (barista style).

Ingredients:
1 tbsp flour
2 tbsp sugar
250 ml oat milk
a few drops of vanilla essence
2 sweet Ines Rosales pastries
Amarena cherries (optional)
Icing sugar to sprinkle
Fresh Fruit to serve (optional)


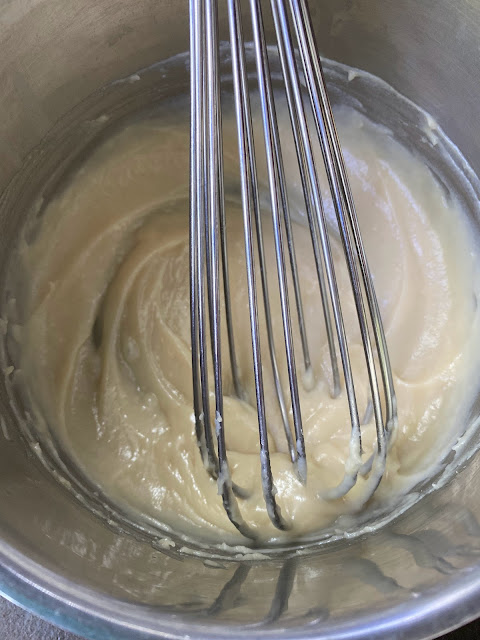
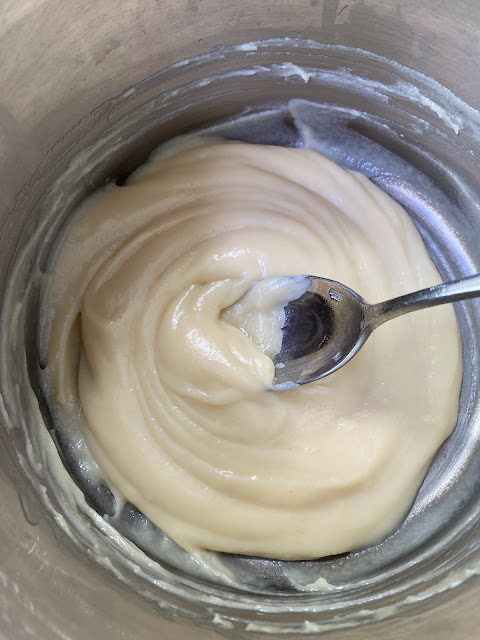
Mix the first three ingredients together and bring to a simmer, stirring constantly. Add the vanilla at the end. You should cook this custard until it is quite thick, and then keep stirring after cooking until it is lukewarm and no more steam comes out. Make sure that is thick, not runny!


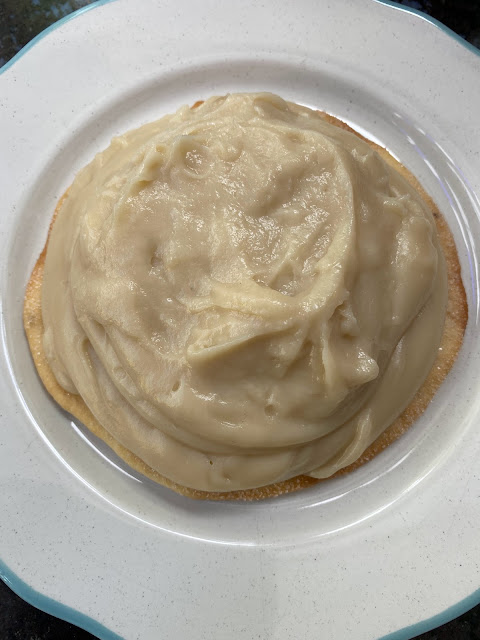
Pile the custard on one of the pastry


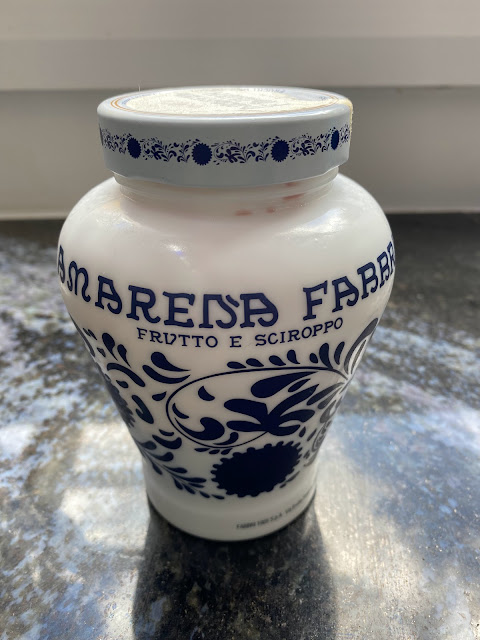
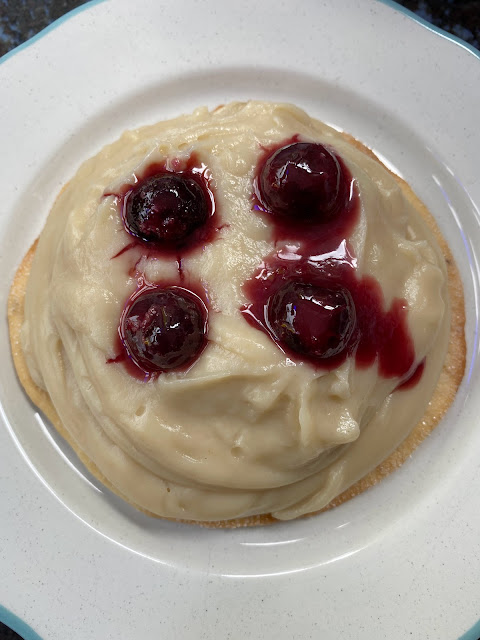
I had some amarena cherries so I though of adding 4 to the custard, but any fresh or preserved fruit would work too. Just don't add too much 'juice'.


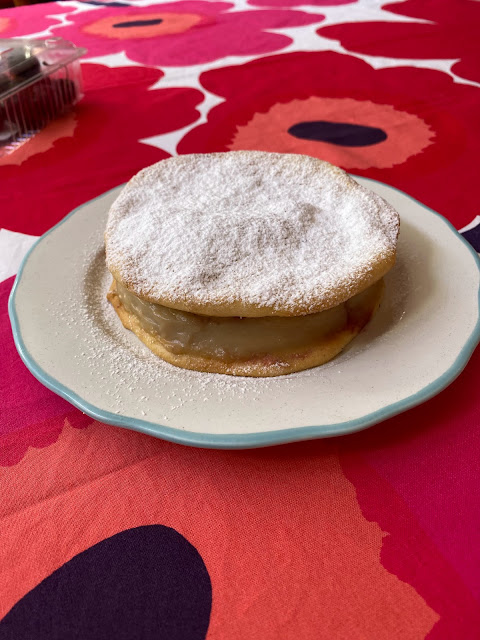
Place the second pastry on top and press lightly, smoothing the custard on the sides with a small spoon, if necessary. Sprinkle with icing sugar and refrigerate for a few hours.


This actually served three people, and we had fresh cherries on the side. I'll definitely make it again, probably with berries or with fruit preserved in alcohol! Yum! A real treat!


 Photos and Recipes by Alessandra Zecchini ©


And now some flowers for my Pinterest board!


 Photos and Recipes by Alessandra Zecchini ©


Saturday, January 8, 2022

Ricciarelli di Siena, and homemade/recycled Christmas decorations


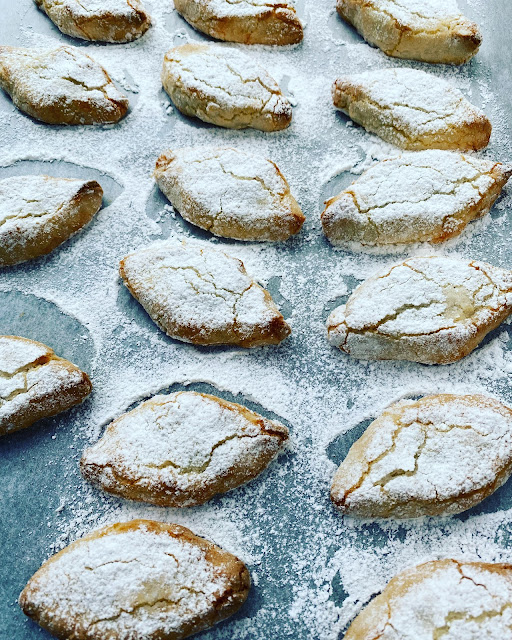
Ricciarelli are delicious Italian (Tuscan) almond sweets, apparently originated in the XIV century.
Making them in New Zealand is quite special, as they really give Xmas an Italian flair. Bitter almonds are one of the ingredients though, and I have not found them here, so I added just a few apricot kernels (be careful, they are poisonous so you just need a tiny amount, and they MUST be blanched). Of course this is optional, you will get great results just with regular almonds.

200 gr of almonds
about 6 to 10 apricot kernels
200 gr of sugar
2 egg whites
zest of an orange or a tbsp of candied mix citrus peels
Possibly some more ground almond if the mixture is too wet
plenty of icing sugar to roll and dust

Blanch the almond and the apricot kernels separately in hot water and remove the skin. 
Place them in the food processor with the sugar and grind to a powder. Do this in two lots, on pulse, making sure that the mixture doesn't heat or becomes a paste.

Lightly whip the egg whites, just gently, they don't have to be stiff like for a meringue, just starting to be white. Add the ground almonds and the orange zest or candied citrus peels. Mix well, if it feels too soft add a little ground almond. Cover and place in the fridge overnight.

The day after flour a board or working surface with icing sugar and roll the paste into thin rolls, about 2-3 cm thick. Cut and shape into biscuits, about 1.5-2 cm high. the traditional shape is like a grain of wheat, with two pointed ends. 

Place on a oven tray lined with baking paper and sprinkle with more icing sugar. Bake at 150C for 15 minutes or until the edges start to be golden. Ricciarelli should not be overcooked! Let them cool down completely before removing them from the baking tray. They keep well for a couple of weeks in a biscuits tin. 


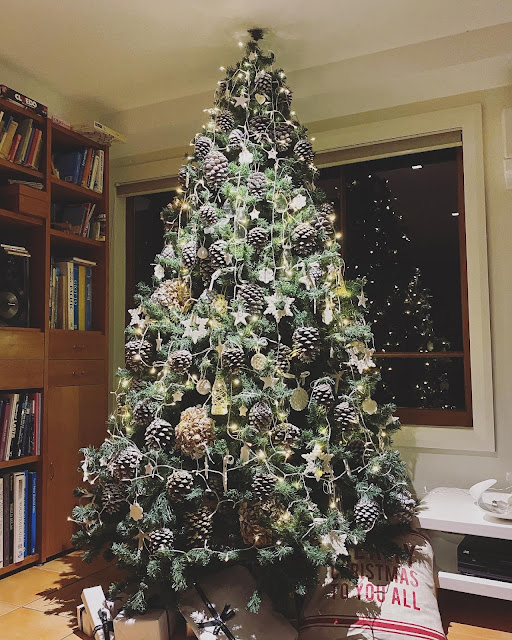
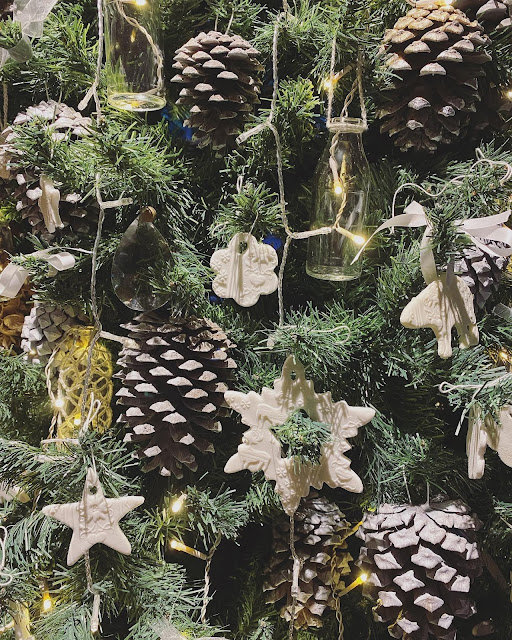
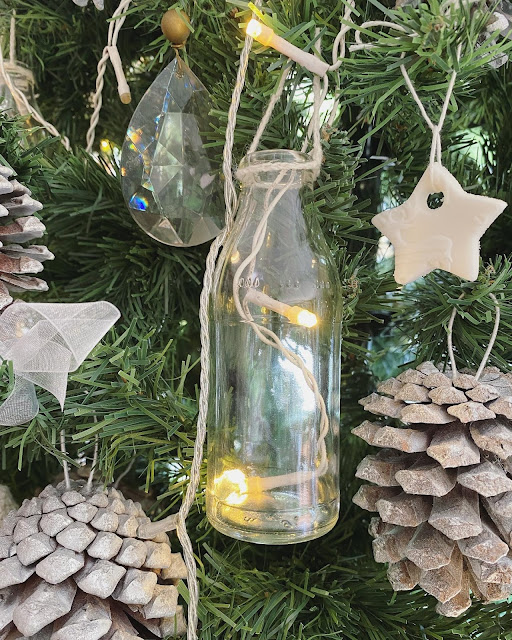
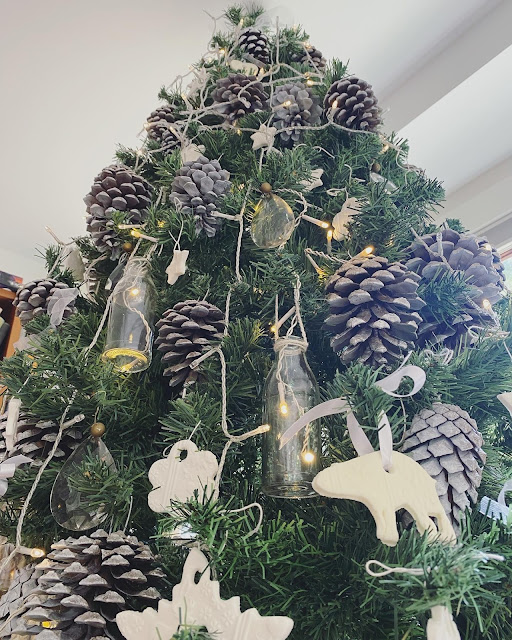
All the decoration on this Xmas tree are homemade or recycled.


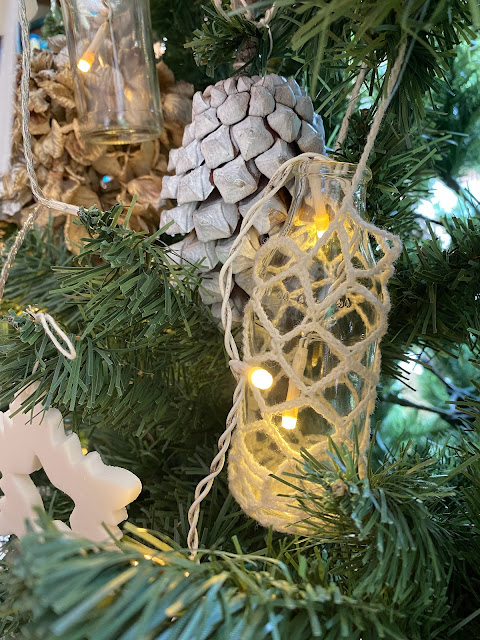
I recycled small bottles fro Italian fruit juices and crochet around them to make lights. I used recycled old wool for the crochet, and also made a few balls and little doilies. I foraged and painted the pine cones, and also spray painted some dried hydrangeas flowers. And then my usual sugar decorations, made with fondant, all white this year! Finally I recycled the crystal drops from a broken chandelier, they look classy on the tree!


 Photos and Recipes by Alessandra Zecchini ©

Thursday, February 18, 2021

Apple cupcakes with dried flowers


I have a selection of dried petals: blue cornflowers, red petals (a mixture of rose, verbena, dianthus) and orange and yellow (marigold and calendula), ready to add to a cake or cupcakes or muffins.

Ingredients for 12 cupcakes/muffins

4-5 Oratia Beauty apples
40 ml water
10 ml lemon juice
120 g salted butter
3 eggs
130 g sugar
A few drops of pure vanilla essence (optional)
200 g self-rising flour
Dried flowers
For the icing:
100 gr butter
100 g sugar
more dried flowers


Preheat the oven to 175°C. 

Line a 12-muffin tray with cupcakes paper cups.

In the meantime place the water and lemon juice in a mixing bowl, peel and slice the apples and drop them directly into the lemony water.

Melt the butter in a jug, either in the microwave or in the oven (while the oven is warming up for the cupcakes). Place the eggs and sugar in a mixing bowl and whisk, using an electric beater, until the mixture looks light and pale yellow in colour. Slowly add the melted butter and the vanilla essence, if using.

Keep beating at a low speed now; add half of the flour followed by half of the lemony water from the apples. Add the rest of the flour and water and keep beating making sure that there are no lumps. Add the apples and the dried petals. Divide into the cupcakes paper cups.

 
Bake for about 18-20 minutes, until golden brown at the top. You can also check by inserting a toothpick into the cupcakes: if it comes out clean the cupcakes are ready. Remove the cupcakes from the tin and let them cool down. The icing is optional, I just mixed some melted butter with sugar and used it to top the cupcakes, then sprinkled more dried petals on top. 


Photos and Recipes by Alessandra Zecchini ©

LinkWithin

Related Posts with Thumbnails